

One of our favorite projects from summer camp!!
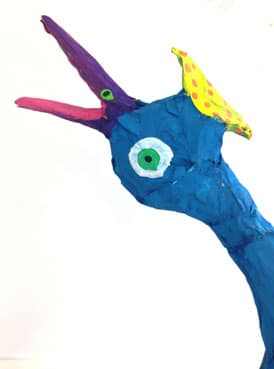
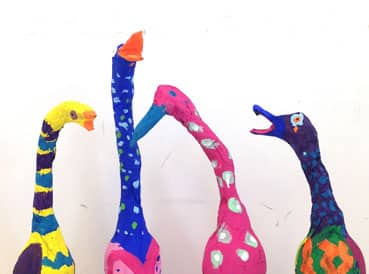
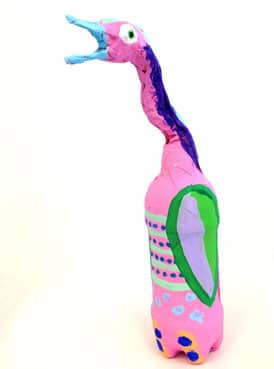
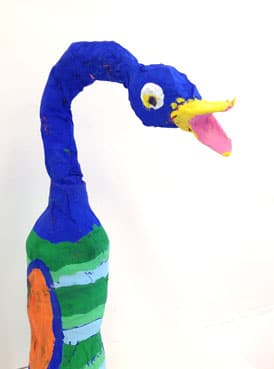
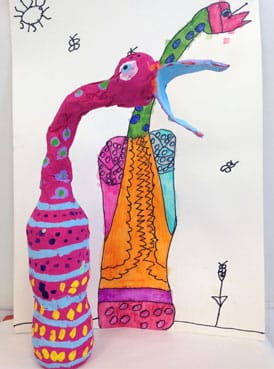
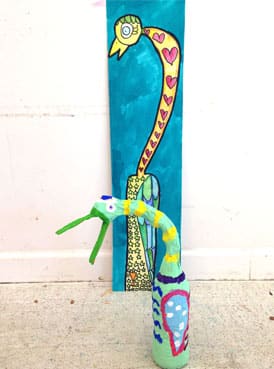
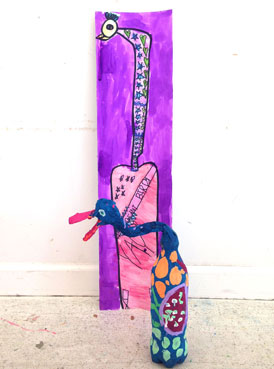
~ Upcycled water bottle bird sculptures inspired by artist Barbara Kobylinska.
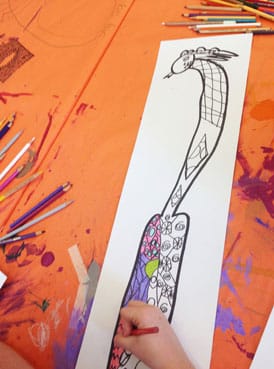
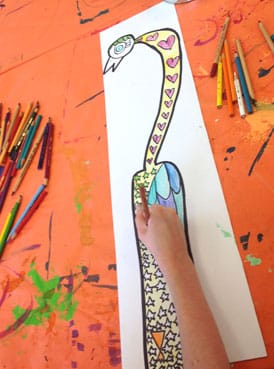
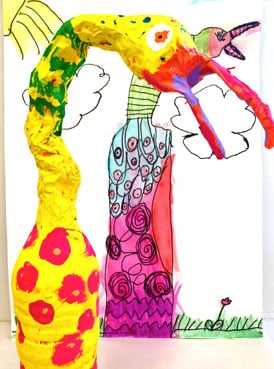
We started by showing students images of Barbara Kobylinska’s amazingly creative sculptures and then had the kids work on designing their birds on paper first. We like to do this because it helps the students understand the importance of thinking about and planning their sculpture, and it becomes a second piece of art!
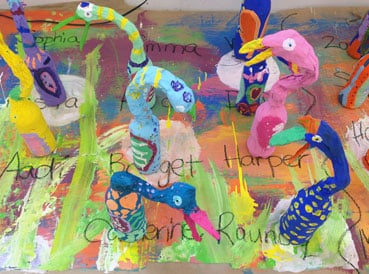
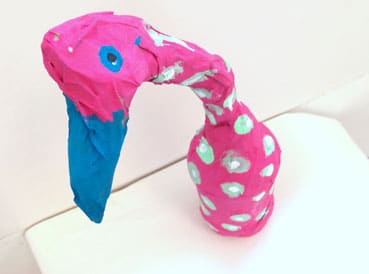
Students were given the freedom to choose what kind of bird they wanted to create, and we were soon surrounded by flocks of penguins, flamingos, peacocks, and other whimsical designs of mysterious species we’ve never seen before!

After filling the water bottles with beans so they would have some weight to be able to stand up (thanks to Katie’s mom for shipping a 20lb bag of pinto beans from Minnesota!!) – we used foil to create the neck, head & beaks of the birds.
Then came the messy part!
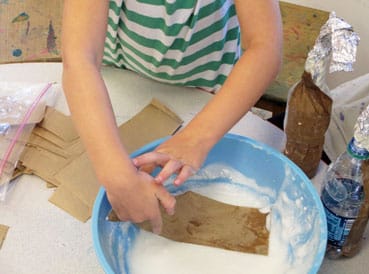
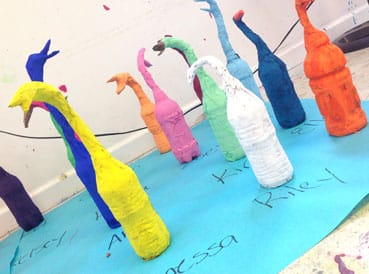
The next day, after the papier mache had dried, the kids applied a base coat of tempera paint. We set them aside to dry during snack time, and then worked on the details, encouraging the kids to paint their features and feathers in “layers” of color!
“Well hello there. I see you.”


Love them all 🙂
They are absolutely fabulous! What age/grade level are the kids?
Thanks Nicole! We did these in summer camp with a mixed age group ranging from about 5 – 9. They were pretty easy – you just fill a water bottle with beans or something heavy to weight them down, then use tin foil and masking tape to “sculpt” the neck & head & beak. I will say, having had a few around the studio since last summer, when we do them again I think we’ll insert a wire into the neck to reinforce it a little. Thanks! ~Jennifer
I love these and would like to do some with my 4th graders at co-op. Just wondering what kind of paper mache you prefer or used.
Thanks Becky! For these we used the old school papier mache – wheat paste & water. You could also just use flour & water. I would recommend that you reinforce the neck with a wire. Have fun!
Thank you, Its absolutely fantastic Idea, easy and quick.