

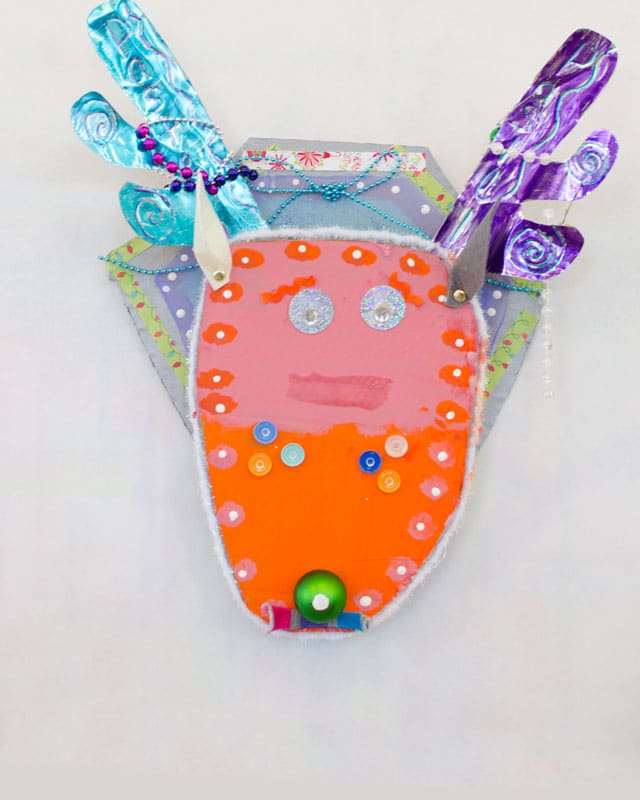
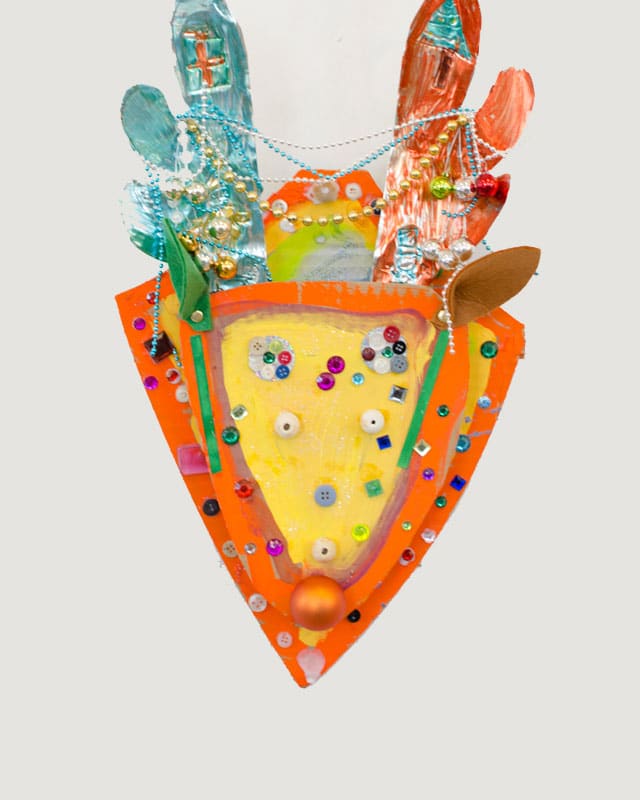
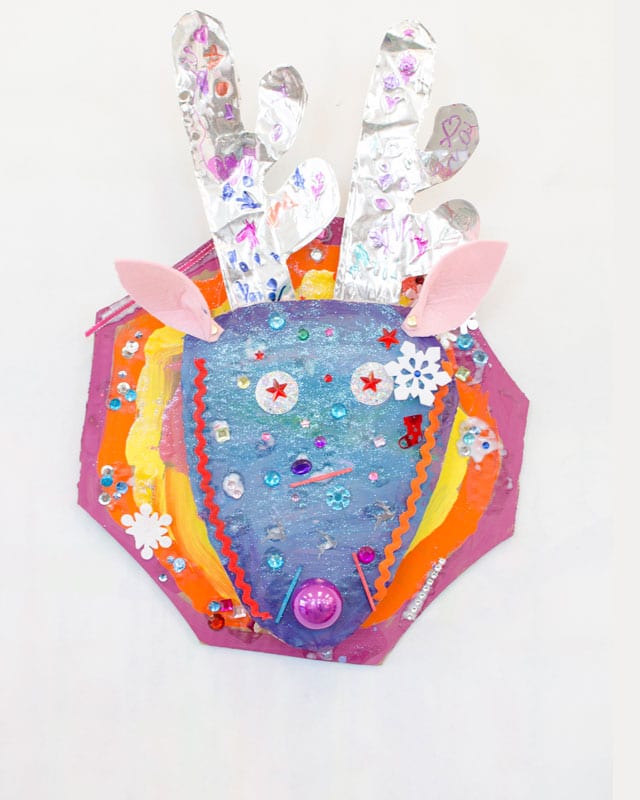
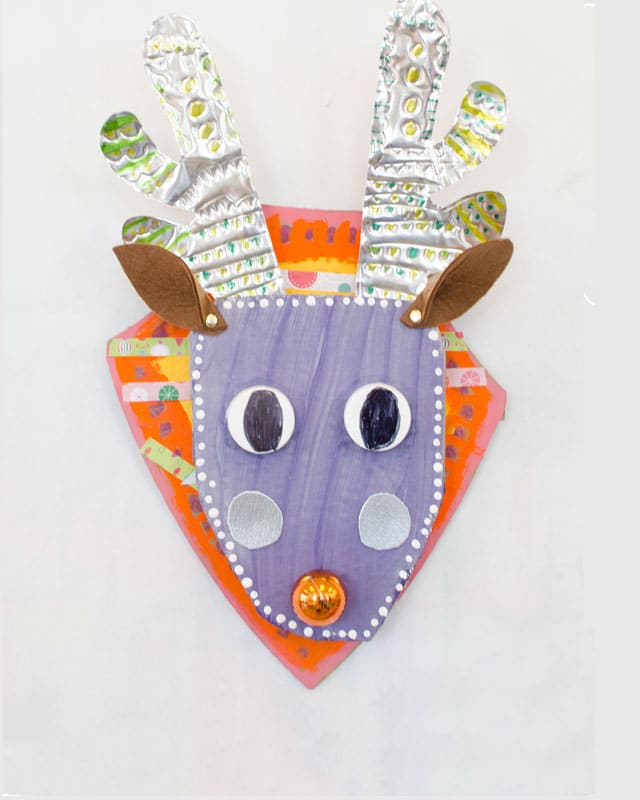
These upcycled cardboard reindeer sculptures were inspired by a mish-mash of all of our favorite reindeer projects from years gone by!
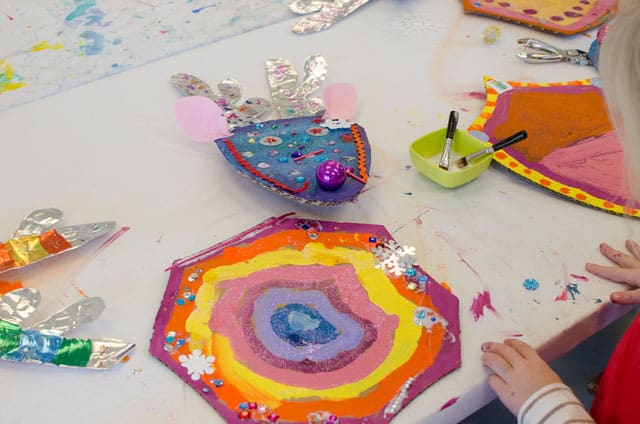
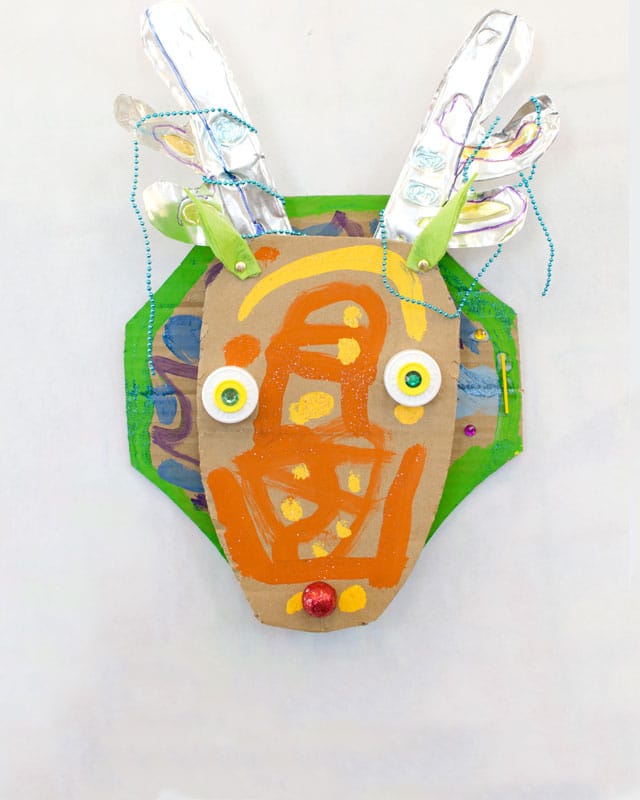
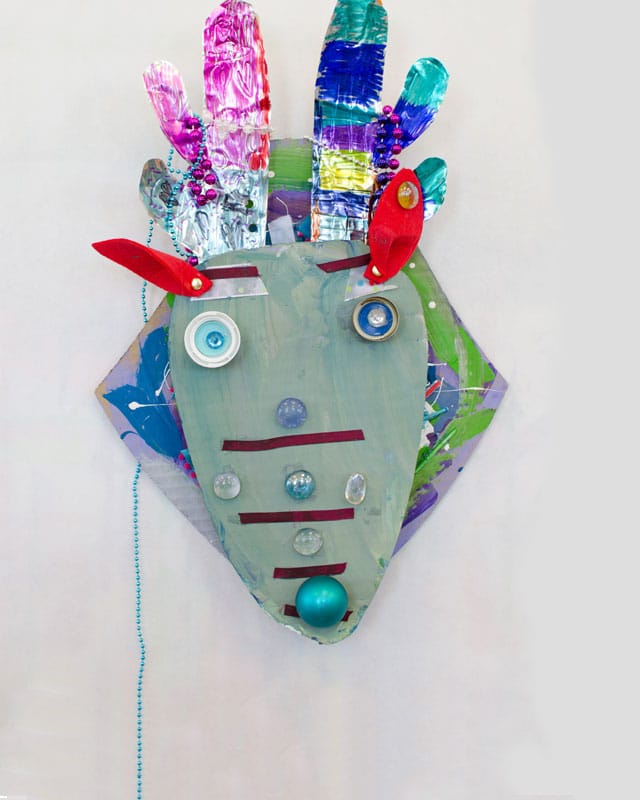
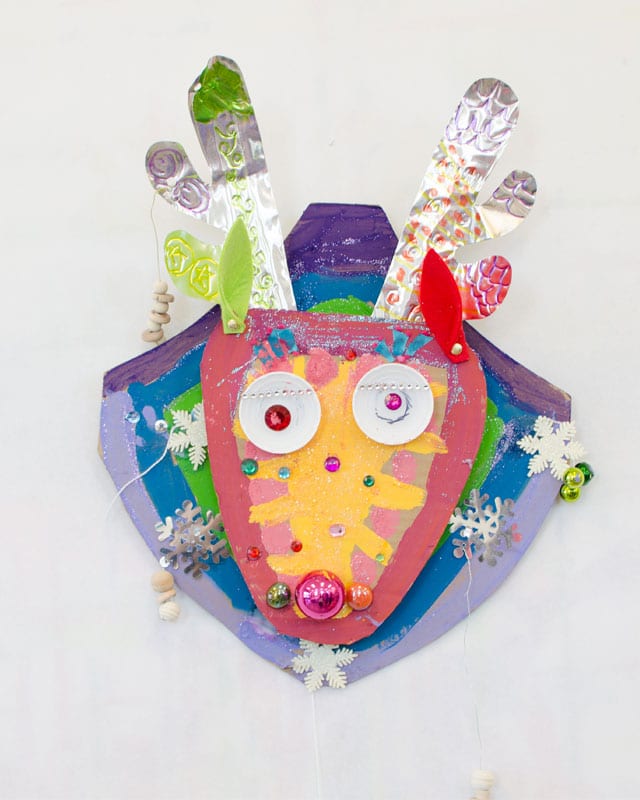
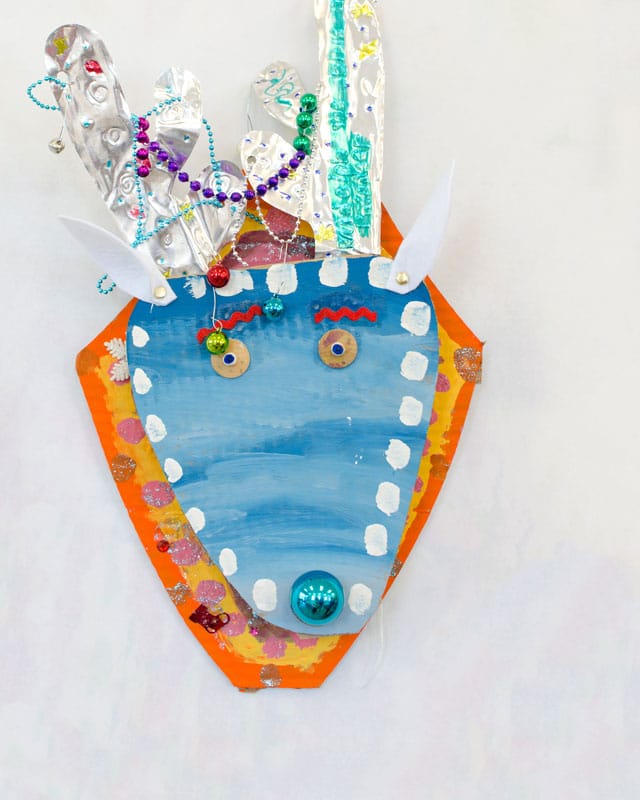
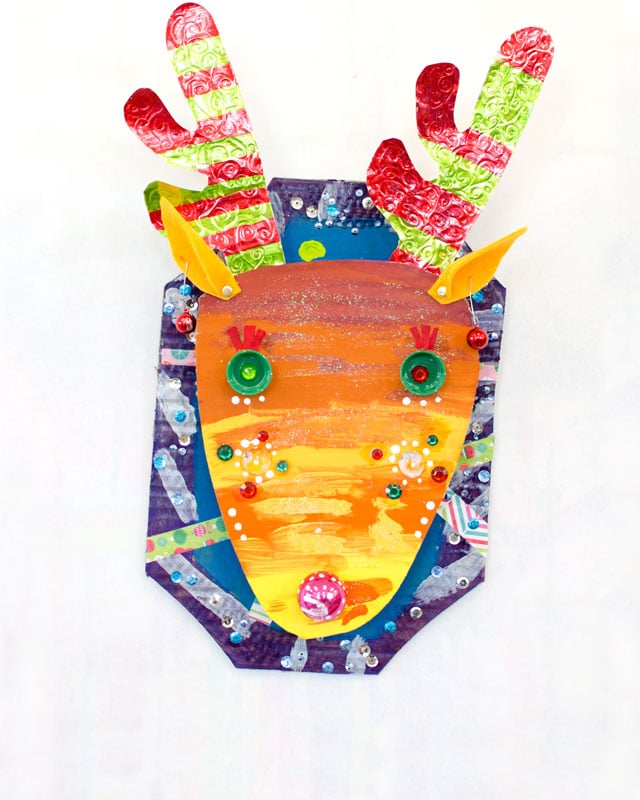
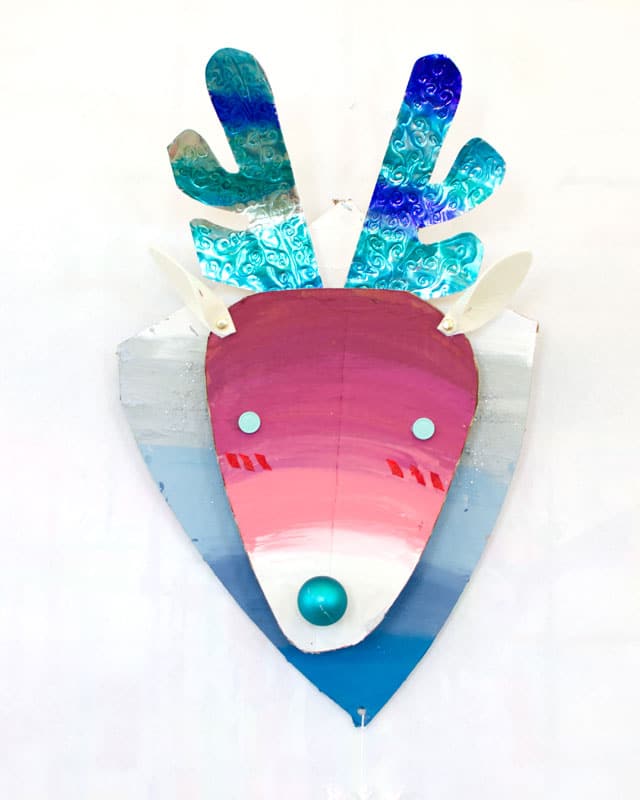
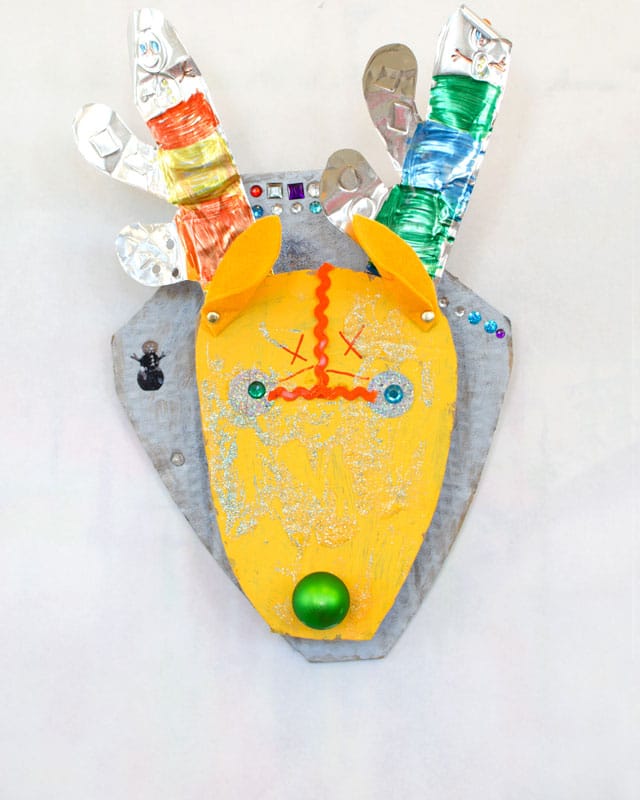
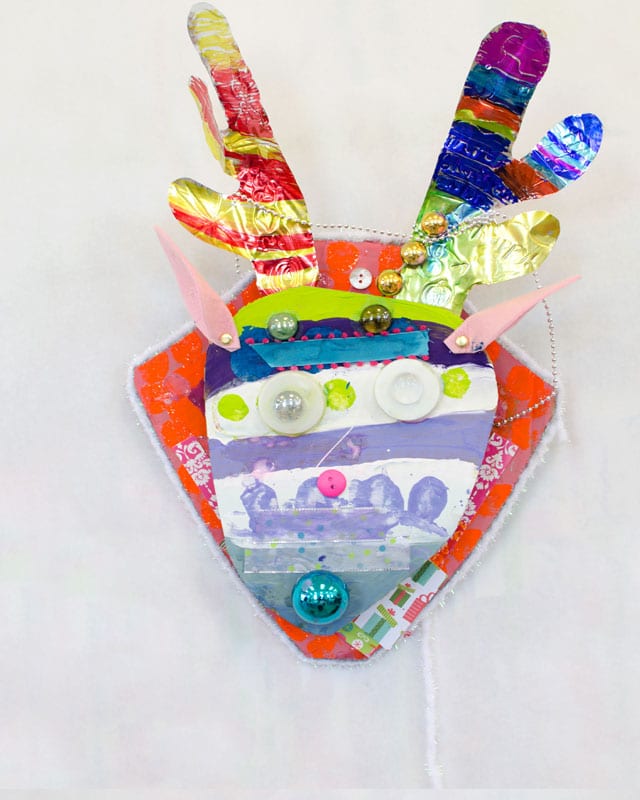
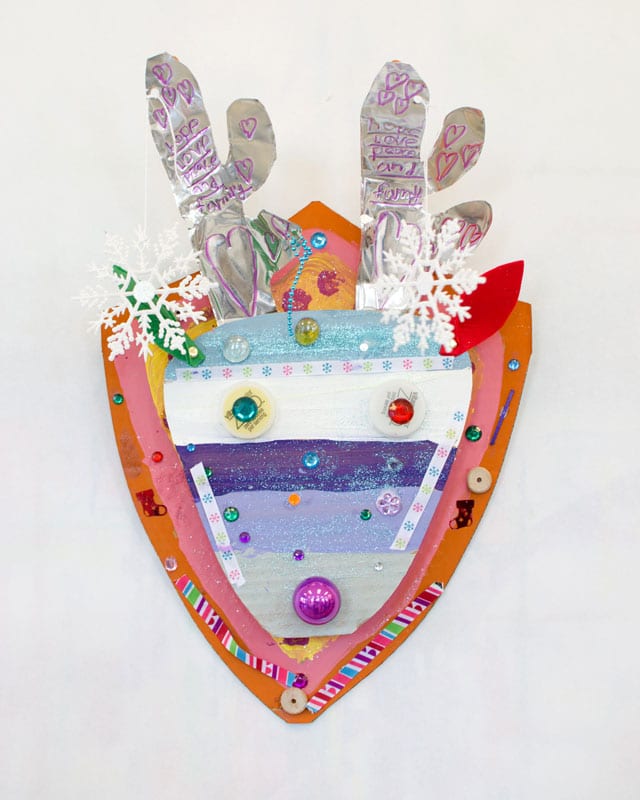
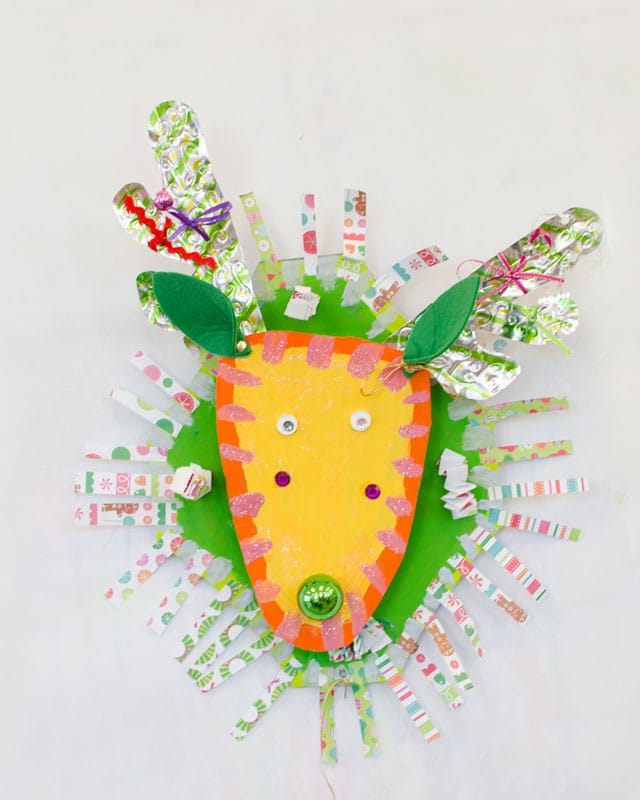
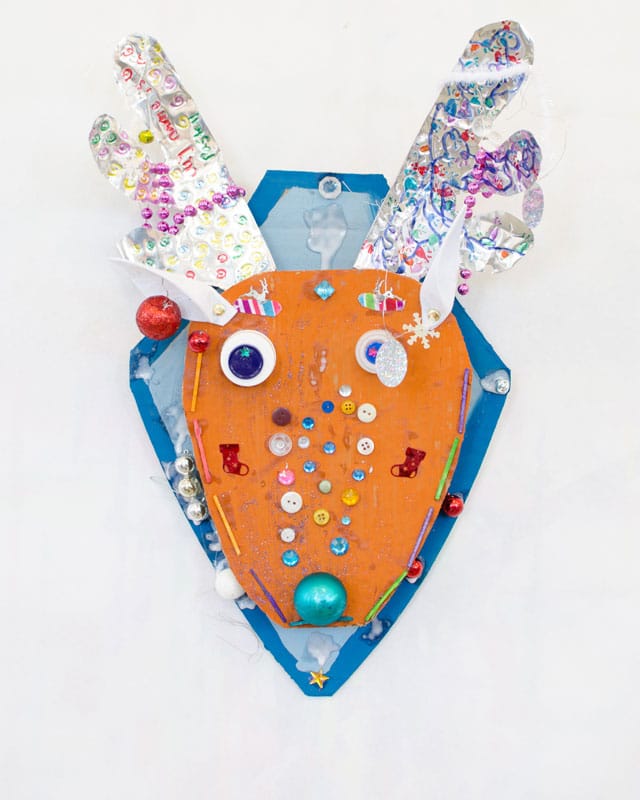
Our imaginative little artists in our Reindeer workshop created these fabulous upcycled cardboard reindeer sculptures, inspired by elk and deer busts mounted on the wall in a hunting lodge. The first step was to select a shape for their base, paint with tempera and set aside to dry.
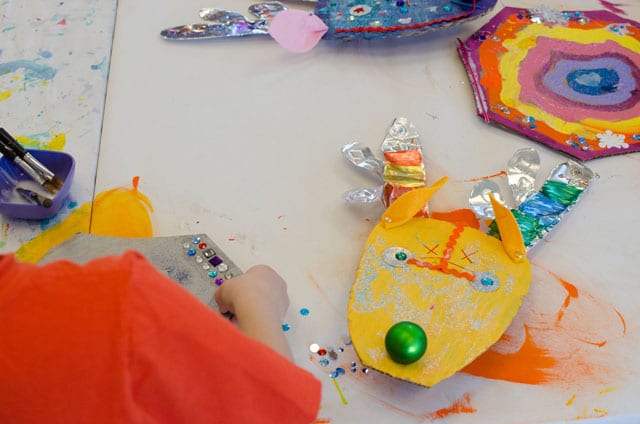
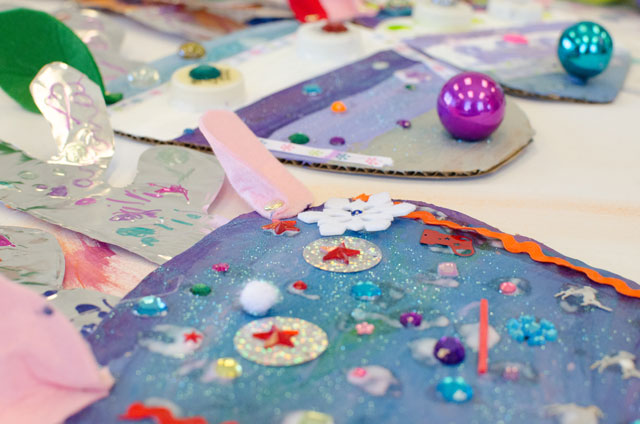
Next they painted their reindeer’s face. We encouraged them to think about their color choices – if they painted their base with cool colors, the face would stand out if they painted it with warm colors. They had lots of creative decisions to make! They could also choose to make a pattern or paint contrasting colors on the snout and forehead. We sprinkled these with a little glitter and set them aside to dry.
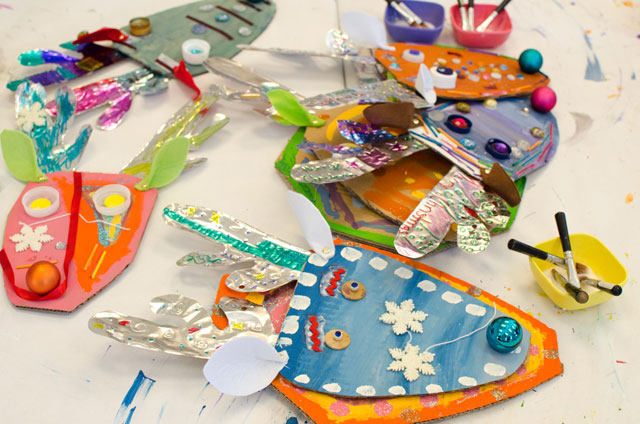
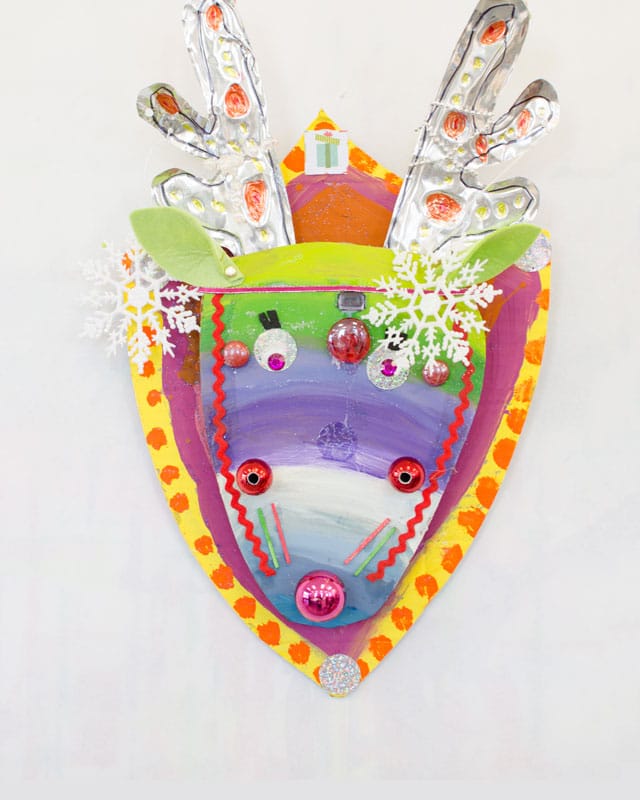
While the face and base were drying, students carved designs into their tooling foil antlers. Some chose to just carve lines and shapes, others chose to write words. As they were coloring them with Sharpies, we used hot glue to attach them to the head (we reinforced them with popsicle sticks on the back).
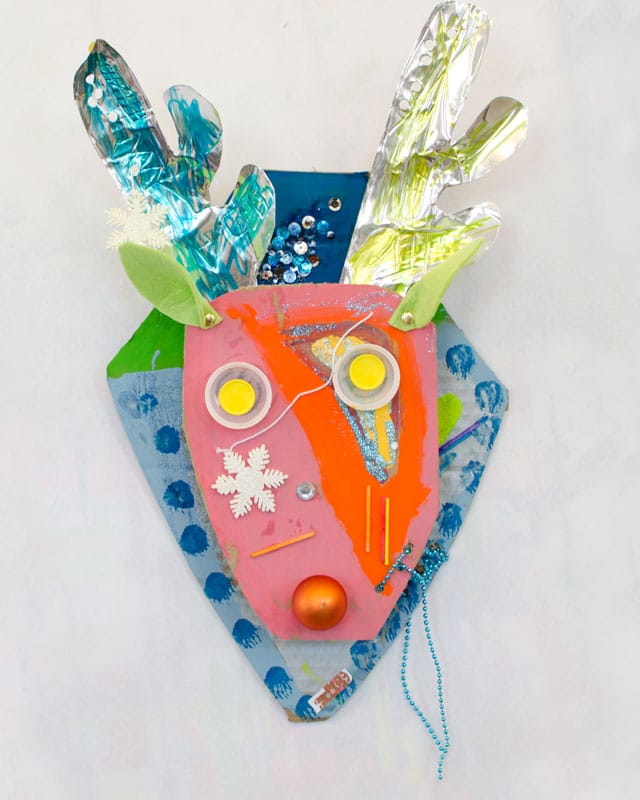
After their paint had dried, then came the fun part! They attached stiff felt ears with brads so they would move, and then got to decorate everything. After selecting a small ornament for their nose (we had previously poked a hole so they could just pop it in), they happily adorned their creations for a solid hour, draping garland, dangling ornaments, gluing jewels +rhinestones, ribbons & trim! As they were working we hot glued their faces to the base, using a small wood block as a spacer in between to create a raised appearance with a little depth.
They were a colorful feast for the eyes, that’s for sure!


These are beautiful! I am going to give these a go with my students this holiday season, very fun. Thanks!
This is a fabulous project! Did you cut out all those cardboard pieces?
Thanks Gloria – yes, we did, I still have the scissor blisters to prove it 🙂 Actually – we pre-cut the plaque pieces in various shapes ahead of time – we usually use a box cutter to cut cardboard, not actually scissors 🙂 and then the face shapes we had them draw and we cut them during class while they were picking out their plaque piece.