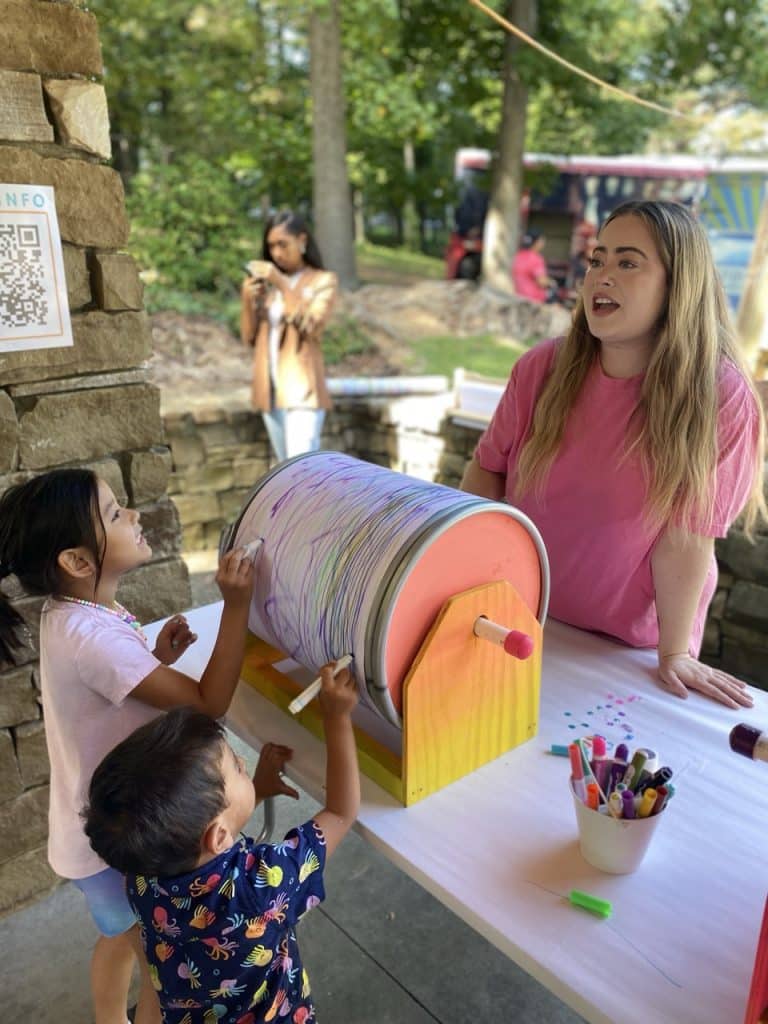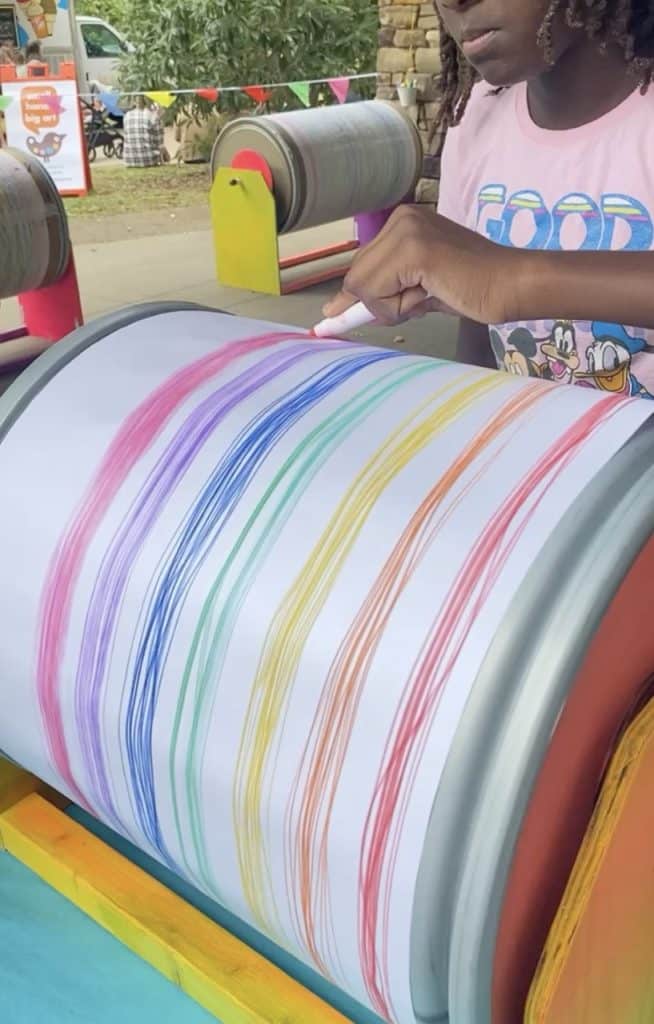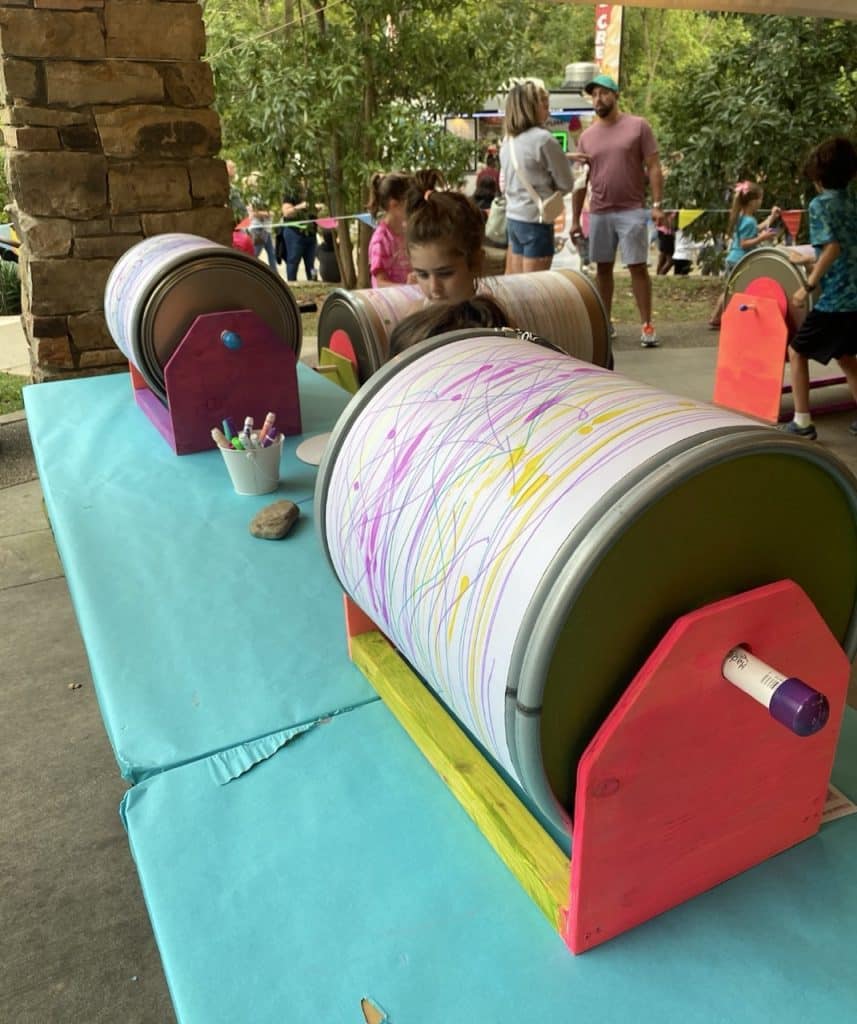

A DIY collaborative process-art activity that combines art, movement, teamwork – and a little bit of science!
Some art projects are fun for a day.
And then there are those magical art-studio contraptions that kids want to use again and again and again.
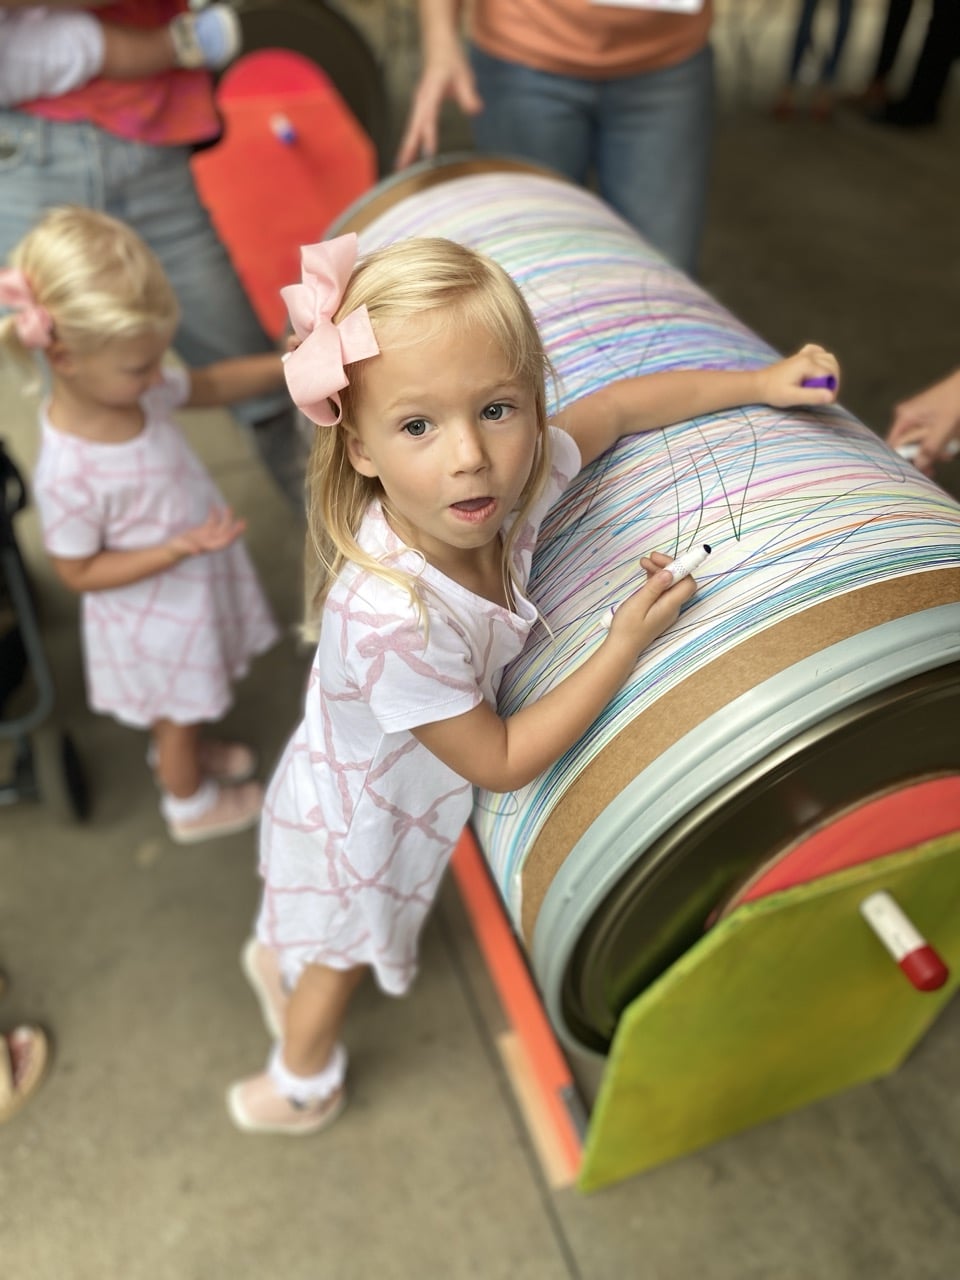
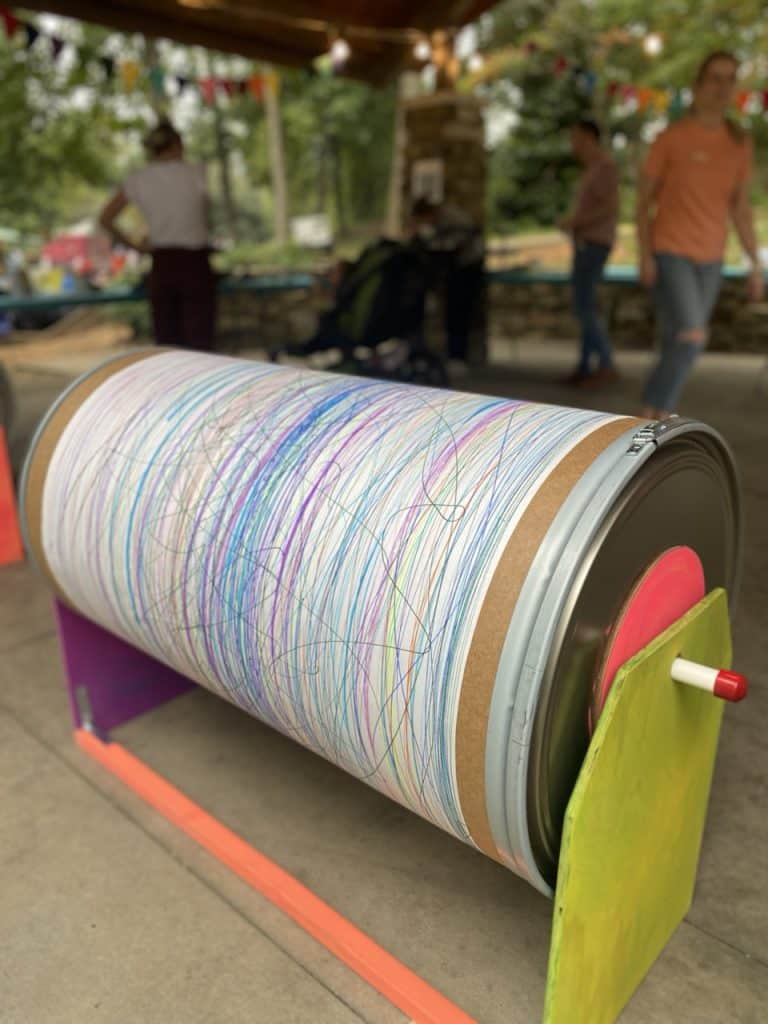
Meet our Giant Spinning Art Barrel.
We originally built these for a big outdoor 3 day arts festival using 75-gallon fiber drums, and they quickly became one of those irresistible art experiences that kids can’t walk past without wanting to give them a spin.
Literally.
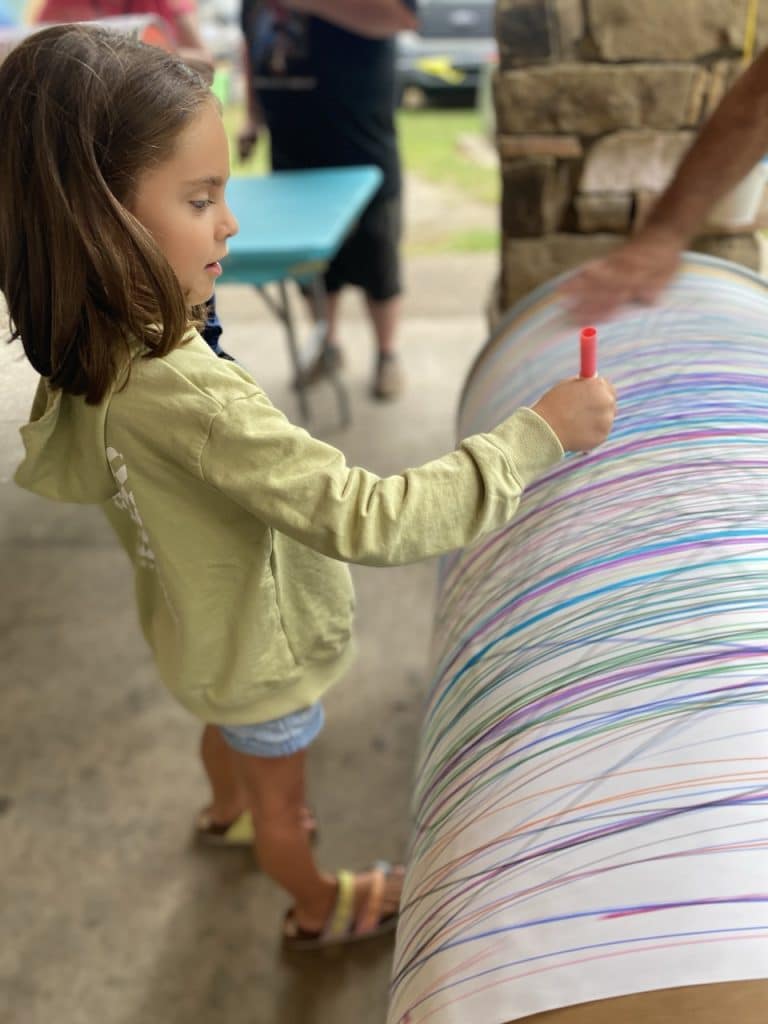
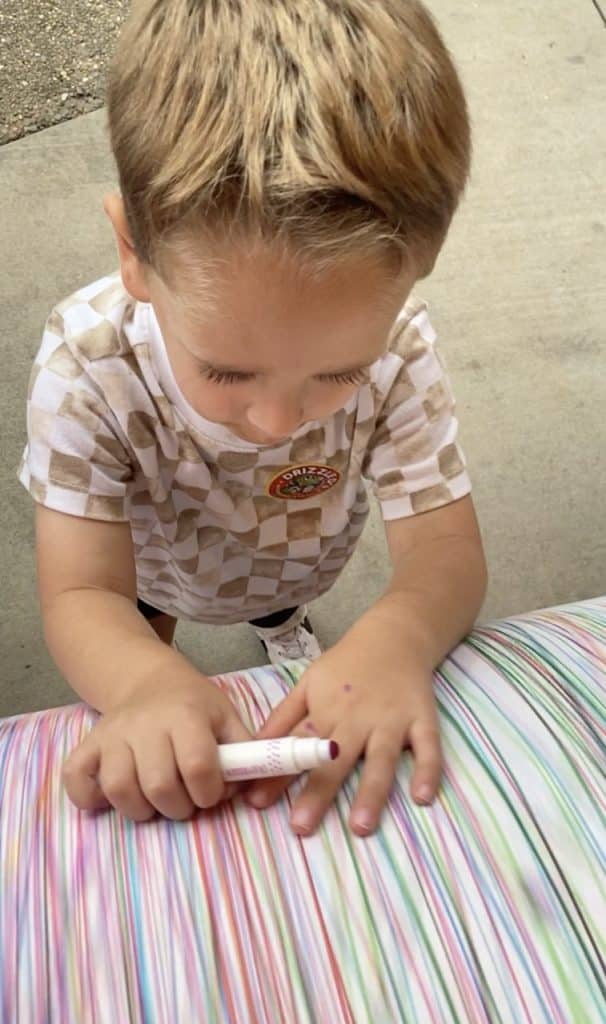
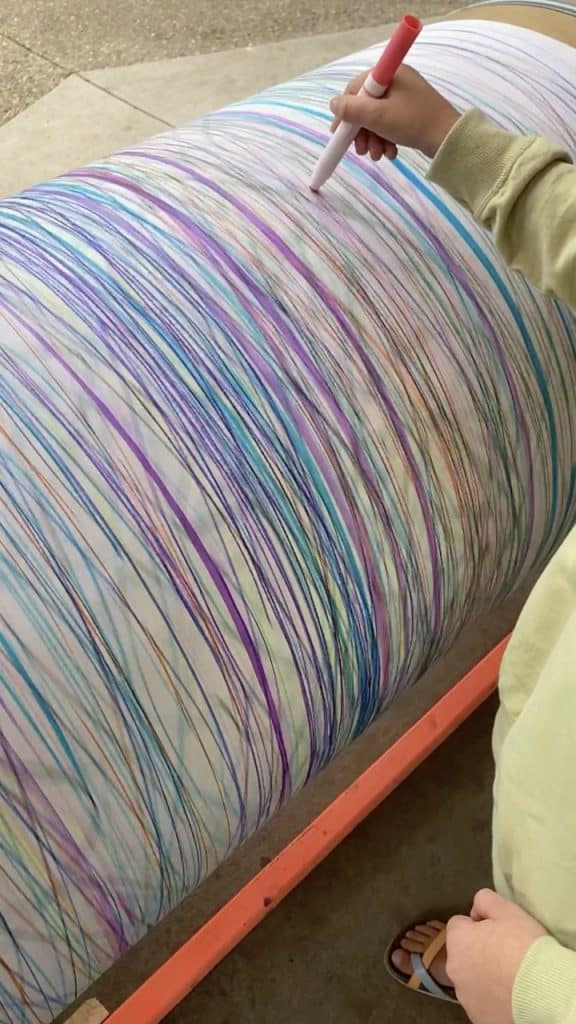
One friend spins the barrel while another holds a marker against the paper. As the barrel rotates, the marker travels around the surface, creating continuous lines and patterns. You could use oil pastels or tempera paint sticks but we don’t recommend mixing mediums.
Change the speed. Move the marker. Add another color. Reverse direction. Switch places.
The results are different every single time.
And while it looks like one giant spinny art game, there’s actually a lot more happening.
Why We Love our Giant Spinny Barrels
This is process art at its very best because the fun isn’t really about creating a particular finished product.
It’s about experimenting.
Kids quickly discover that what they do affects what appears on the paper.
What happens if we spin faster?
Is it better to hold my marker perfectly still or try to move it with the spinning?
What if I steadily move my marker side to side?
What if we reverse direction?
They’re experimenting with motion, speed, direction, pressure, repetition and cause-and-effect –without anybody needing to announce that they’re learning a little science along the way.
There’s also something surprisingly soothing about it. The repetitive rotation of the barrel and the continuous movement of the marker can be incredibly rhythmic and mesmerizing. Kids can slow everything down and simply watch a line travel around and around the barrel. I was kind of surprised how many kids seemed to want to just lay on it or hug it!
And then… our favorite part?
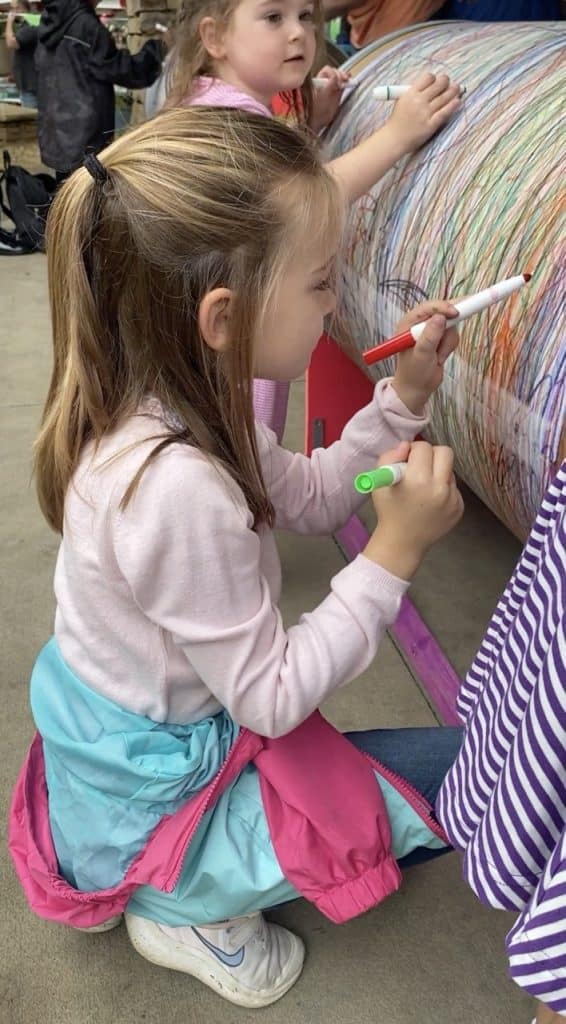
It takes two.
One person controls the movement of the barrel while the other controls the art.
They have to communicate and coordinate with each other:
“Slower!” “Okay, faster!” Then they switch jobs.
It’s a super simple way to encourage collaboration, communication and turn-taking while making art together.
Ready to Build One?
Here’s how we made ours.
First I’m going to say, don’t be intimidated by the length of these directions. As I am going back to edit, I realize I could literally not have made them any more detailed. But most of you could glance through this, check the photos, and get the “gist” pretty quickly. It is nowhere near as complicated as it might sound reading it step by step like this! But I couldn’t find anything online and had to sort of invent it as I went but hopefully this saves you a lot of time!
One important note before you start: build your stand around your actual drum – for this part you’ll need to do some precise measuring – mostly for the axle height so the barrel clears the ground.
The important things are that your two end supports match, your axle holes line up perfectly, and your barrel has enough clearance to rotate without touching the frame.
What You’ll Need
For getting your husband on board:
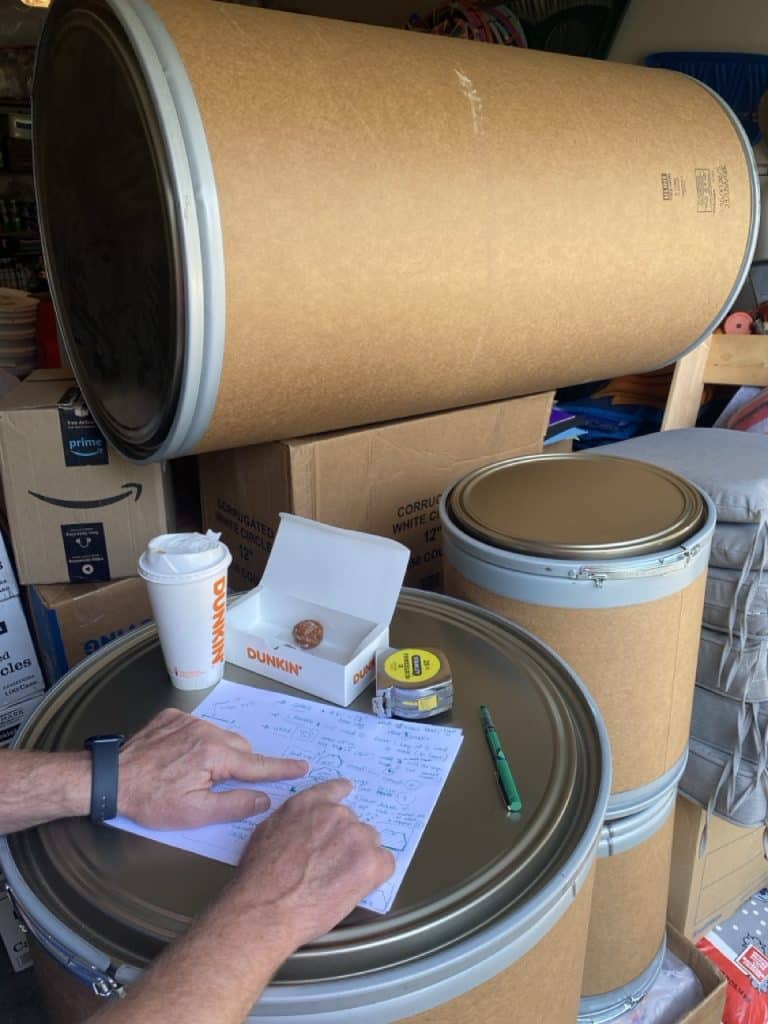
- At least one (or four) dozen Dunkin Munchkins.
For the spinning barrel:
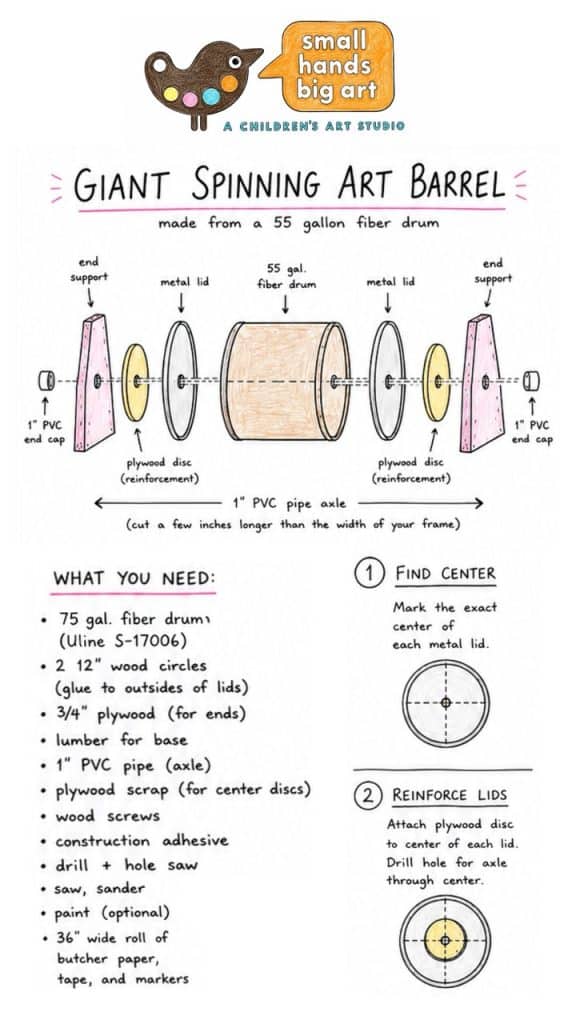
- One 55-75 Gallon Fiber Drum— we used the Uline 75 gallon Fiber Drum (we also made some mini table top versions with 10 gallon drums – scroll down to the bottom for some photos of thos). We chose the 75 gallon drum for it’s size and also because a roll of 36″ wide butcher paper fit nicely, which is what we had. If you get the smaller 55 gallon drum, you could get a roll of 30″ butcher paper.
- Two 12″ unfinished wood circles to reinforce the center of the drum ends (the lids)
- E6000 adhesive
- 1″ PVC pipe for the axle
- Two 1″ PVC end caps for the little nubbies on the ends to keep the axle securely in place once everything is assembled. The link is to a pack of 10 -you don’t need that many but wanted you to see them – you can find these individually at your local hardware store with the pvc pipe.
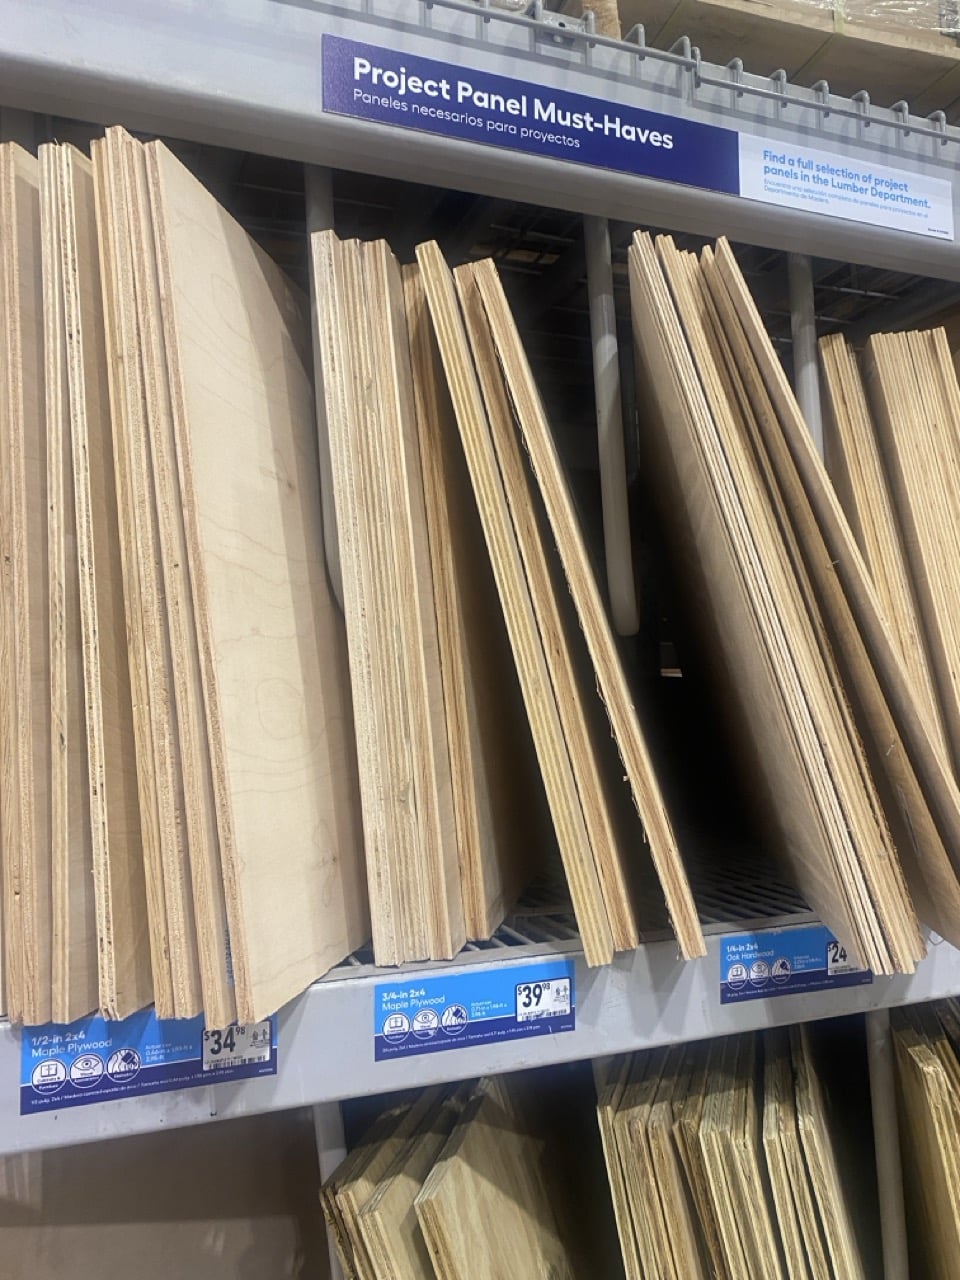
- 3/4″ plywood for the two end supports
- Lumber for the long base rails – we used 1×2’s
- Lumber for cross bracing OR metal L-brackets to secure all four corners. We used brackets but these things take a beating so cross bracing would give it a longer life I think!
- Wood screws
- Drill
- Hole saw (drill bit) sized appropriately for your PVC pipe
- Table, chop or jig saw
- Sander/sandpaper
- Clamps
- Tape measure and straightedge
- Paint for the stand
For making art:
- 36″ wide roll of butcher paper
- Surgical tape to tape the paper on the roll. *yes, surgical tape 🙂 This took some experimenting, we didn’t want an unsightly horizontal line of ugly tape to visually break up the smooth vertical lines as it was spinning and interfere with our hypnosis. We also wanted something that wouldn’t rip the paper as we removed it (because this line paper is cool stuff and you’ll want to keep it and wrap all your XMas presents with it!!) – so we ended up using 2″ wide white paper / surgical tape. It was perfect! – It was basically invisible to the eye and touch, and removed easier than painters tape! And to help secure a fresh sheet of paper to the barrel, we placed a row of glue dots where the paper starts, and it remained sticky enough to last three straight days of the festival! That provided just enough tackiness to grab the end of the paper and hold it in place, while we wrapped the paper around the barrel. Definitely a two person job!
- Markers – we strongly suggest the cheapest “throw-away” markers you can find in bulk – they will get trashed. We used these.
Step 1: Find the Exact Center of the Drum Ends
This may be the most important step in the entire project (the science part). You want your axle to pass through the exact center of both ends of the drum or it will not spin.
Measure carefully in several directions and mark your exact center point. If the axle is off center even a tiny bit it means an off-center rotation, and instead of smoothly spinning, your barrel will wobble and drag.
Step 2: Reinforce the Ends With the 12″ Wood Circles
The lids of the drum are a thin metal, so we added a 12″ wood circle to the outside of each end of the drum to create a stronger, more stable area around the axle.
Find and mark the exact center of each wood circle.
Using E6000 adhesive, glue one wood circle securely to the outside of each drum end, carefully lining up the center marks.
Allow the adhesive to fully cure before continuing. PRO TIP: DON’T USE WOOD GLUE! I tried this initially but the lid of the drum is metal and non-porous, so it required more of an epoxy / gorilla glue – the wood glue wouldn’t set up & dry. Once everything is secure, drill the axle opening directly through the center using the round drill saw.
The goal is for the holes on both ends to line up as precisely as possible so the PVC axle travels straight through the center of the barrel.
Step 3: Make the Two End Supports for the Base
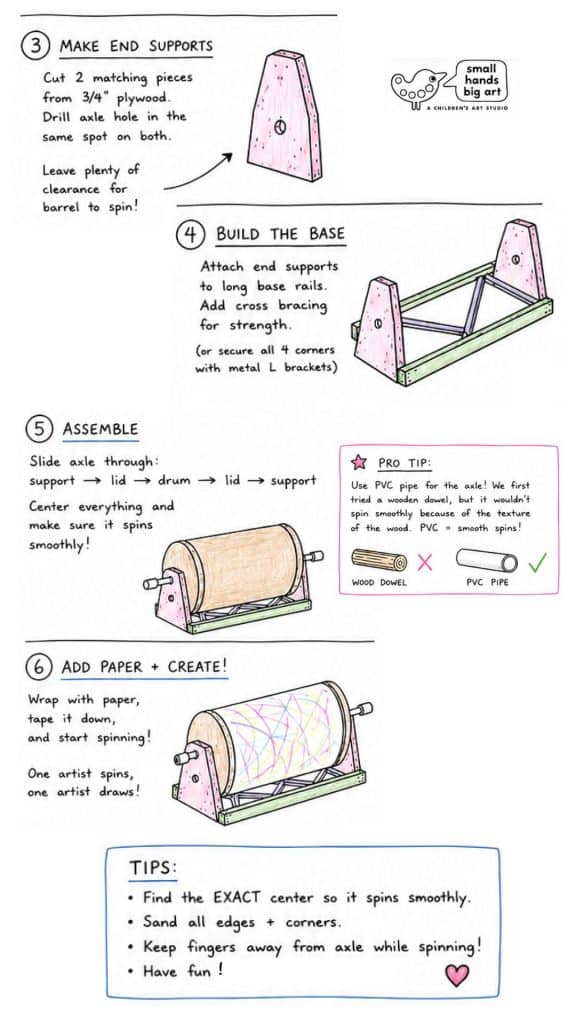
Next, cut two matching end supports from 3/4″ plywood. These are the upright pieces that will hold your spinning barrel off the ground.
Our supports have a wide, flat bottom with slightly angled sides and clipped upper corners. There’s nothing magical about that particular shape—we liked the way it looked and it created a sturdy base.
PRO TIP: Use holes for the axles vs. U slots
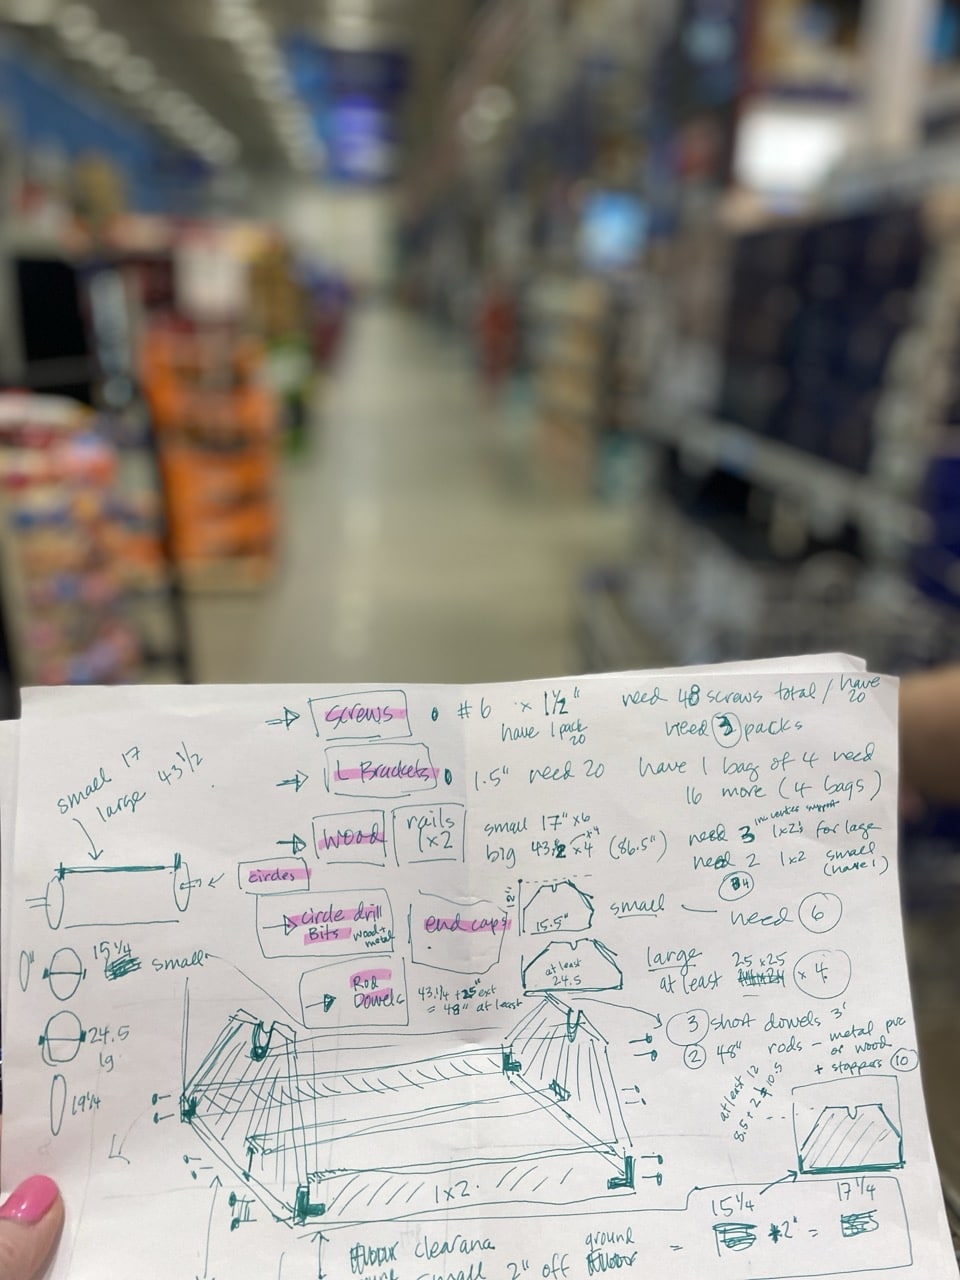
I would not suggest cutting a little U in the top to “rest” the axle in the base. You can see in my original scribbles that was my initial idea. But these have some weight to them and I suspect they would bounce a little and jump out of the base if they were just resting in a slot.
What’s important is the height from the ground up of the hole for your axle. A 22″ diameter barrel has an approximately 11″ radius, so the center of your axle needs to sit high enough above the bottom of the frame to give the barrel room to rotate freely. Give yourself some extra breathing room rather than trying to make the fit too tight. Account for the wood at the bottom of the base.
Here’s another important trick:
Clamp the two plywood supports together before drilling your axle hole.
That allows you to drill through both pieces in the exact same location for each side.
Your PVC should be able to rotate freely inside these openings. You don’t want such a tight fit that friction makes the axle difficult to turn.
Sand the supports thoroughly, and the inside of the axle hole. Especially anywhere little hands might encounter an edge or corner.
Step 4: Build the Base
Now connect your two end supports with long wooden rails to create the frame. We used 1×2’s.
The frame should be slightly longer than your drum so the barrel can sit comfortably between the two supports without rubbing against them – but not so much extra room that little hands can get inserted into the space on the sides. As it spins it will also move from side to side a little, so the less wiggle room here, the better.
Secure the end supports firmly to the rails. For additional stability, you can add wooden cross bracing between the rails, OR secure all four corners with metal L-brackets.
The most important thing is that the finished frame is square, sturdy and resistant to racking or wobbling while kids are using it.
Before moving on, set the drum into position and check your clearance. Nothing should touch the barrel when it rotates.
Step 5: Create the Axle
PRO TIP: Don’t use a wooden dowel.
For the axle, we strongly recommend 1″ PVC pipe, not a wooden dowel. A wood dowel seemed like an obvious choice but the texture of the wood created too much friction as it moved through the supports. The barrel didn’t rotate smoothly at all & there was a lot of “drag”. We switched to smooth PVC pipe, and it made a huge difference.
Cut your PVC several inches longer than the entire width of the assembled frame so that a little pipe extends beyond each end support.
Step 6: Assemble Your Spinning Barrel
Now comes the satisfying part! Carefully feed the PVC axle through the entire assembly so that the drum is centered between the two end supports.
Once everything is assembled, place a 1″ PVC end cap on each exposed end of the axle. Before painting or decorating anything, give the barrel a test spin. It should:
- rotate freely,
- stay centered,
- clear the base and cross braces,
- and spin without significant wobbling.
If something is rubbing, binding or wobbling, this is the time to adjust it.
Step 7: Paint Your Stand
Technically optional. But a bare fiber drum and wood are boooooring. We painted ours in bright colors before putting them into action.
If you’re making these for an art room or classroom, this is also an easy opportunity to turn decorating the stands into an art project of its own.
Just make sure all surfaces are completely dry before reassembling the barrel.
Step 8: Add the Paper
Now you’re ready to make some ART.
Wrap 36″-wide butcher paper around the barrel and secure it with tape. I was excited that this size paper fit perfectly! You want the paper snug enough that it doesn’t shift or bunch as the barrel rotates.
Then grab some markers and find a partner. One artist takes the SPINNING job. The other takes the DRAWING job. And… GO!
Experiment With It!
Once kids understand how it works, encourage them to start experimenting instead of giving them specific instructions.
Try:
Slow spin + stationary marker
Then…
Fast spin + stationary marker
What changed?
Try moving the marker slowly from one side of the barrel to the other while your partner maintains a steady speed.
Try two markers simultaneously. Change colors. Change direction. Vary the pressure. Spin, stop, reposition and spin again. Then switch jobs.
The giant barrel essentially becomes a simple drawing machine powered by two artists.
And that’s where the magic is.
The Best Art Tools Don’t Always Come From the Art Store
That’s probably one of the things we love most about this fun contraptions! It’s a shipping drum, some plywood, a piece of PVC and a roll of paper.
So simple but it’s a whole experience that invites kids to move, experiment, cooperate, problem-solve and create together.
There’s no predetermined finished product.
There’s no example they’re trying to copy.
There isn’t even one person in control of the outcome.
It’s collaborative. It’s unpredictable. It’s a little bit scientific. And it’s ridiculously fun.
Which, in our book, makes it exactly the kind of thing that everyone should have.
Happy spinning! 🌀
— Small Hands Big Art
Here are some photos of the smaller table top 10 gallon drum versions.
We used this craft paper roll dispenser from Amazon. This makes a nice size to make personalized desings to keep, so we replaced the paper on these much more often! We had to cut about an inch off the length of the rolls of paper to fit the drum – we used the table saw to chop the ends off. But maybe you can find rolls of paper to fit!