

This Disney inspired It’s a Small World collagraph printmaking art project literally lit us up!
We did an “It’s a Small World” inspired cardboard relief collage project over the summer with our younger students (you can ooh & aah over them here). That fun project must have given us the fever because I just couldn’t get these beautiful shapes out of my head!
So we decided to put a teen spin on it and do a collagraph printmaking project!
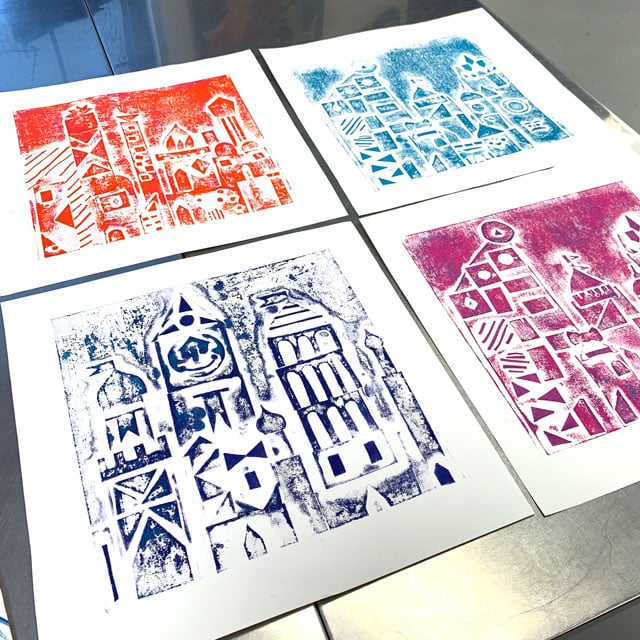
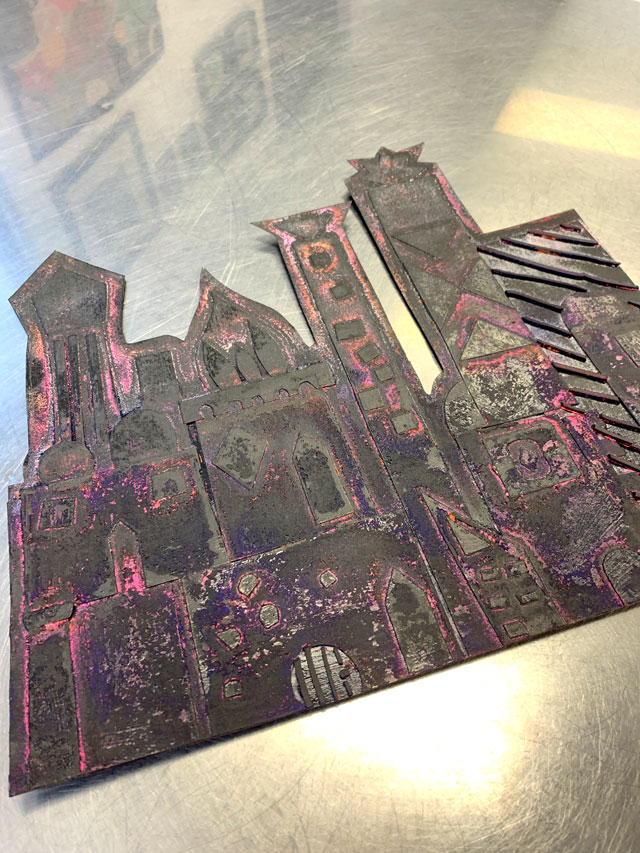
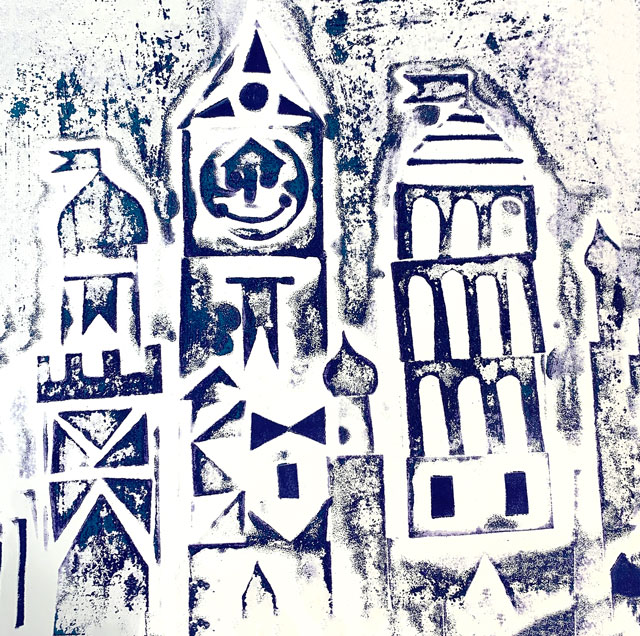
We used a heavy 6 ply black poster board for the print plate. Why black, you ask? We love to turn our printing plate into a 2nd piece of art after pulling prints, and we love the way that chalk or oil pastels grab ahold of the toothy texture of the dried printing ink! The contrast of the bright colors against the black is so stunning.
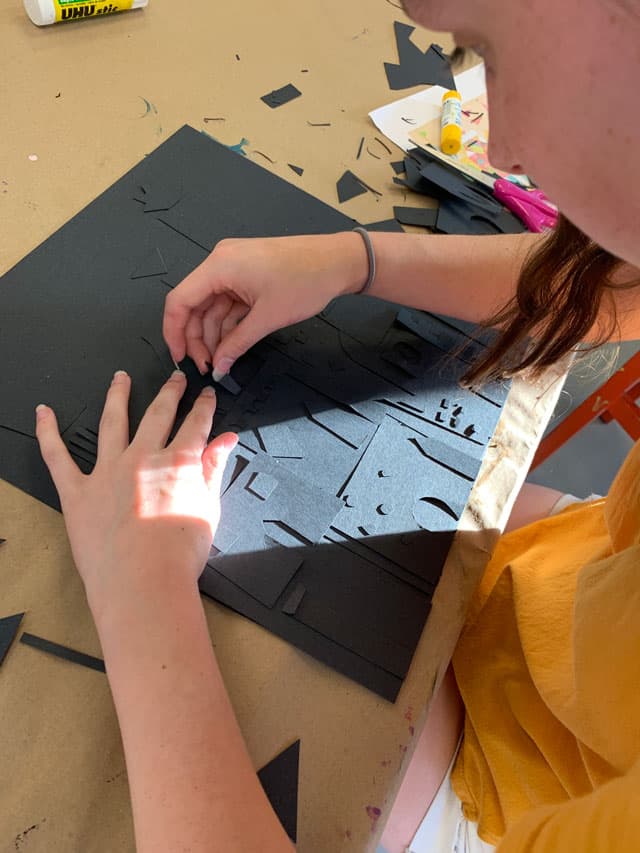
But you’ll just have to take a word on THAT, because we never actually made it that far since we decided to do these super large scale (16×16), which was very time consuming! The first class period (1.5 hours) was spent cutting and creating their printing plates. We used a strong glue stick and then gave it a thick coat of Mod Podge to seal all the pieces in place. Trust me, that’s a huge benefit when using glue sticks because when you print them, all their little pieces won’t come flying off and stick to the brayer. You’ll be able to pull several nice prints with a sturdy Mod Podge reinforced plate!
The successful creation of a layered collagraph print is generally a 2-3 session project for us. Its an ideal project for a week of summer camp, and the technique we use can be modified or shortened to be completed within 2 class sessions.
CREATING YOUR PRINTMAKING PLATE:
- Select a subject that will have a variety of shapes/layers
- Each element of the scene must be cut out of a different piece of poster board, adhesive foam or card stock. The colors of these pieces don’t matter – they will all get covered in printmaking ink. What matters are the shapes and layers. We generally work up to 3 layers high. It is important to leave an empty space (“a sidewalk for ants”) between the shapes. Plates can be left large or cut down slightly larger than their subject.
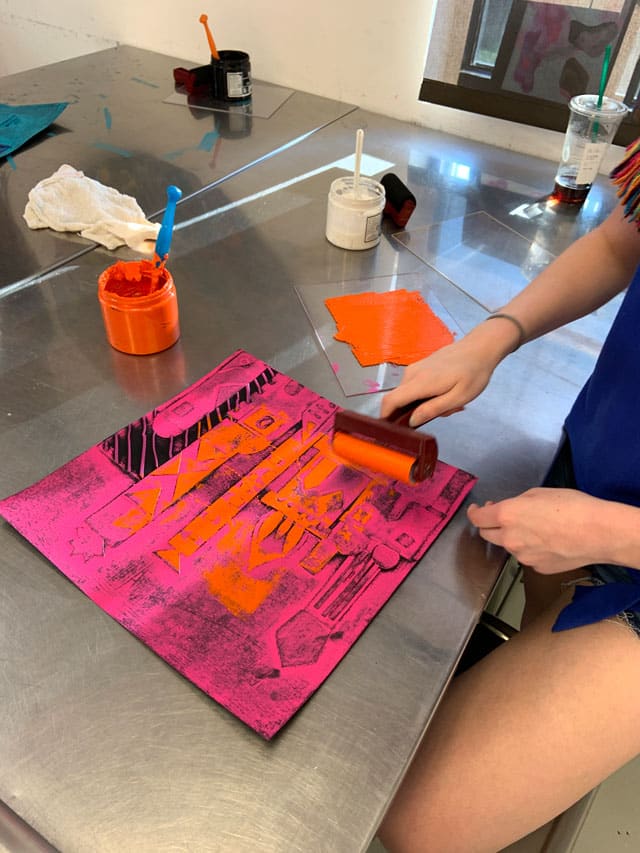
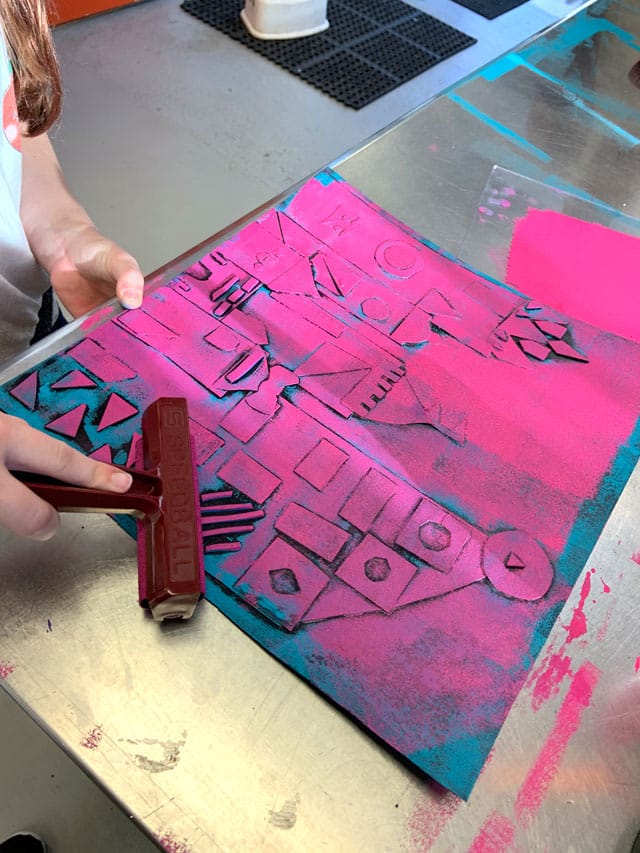
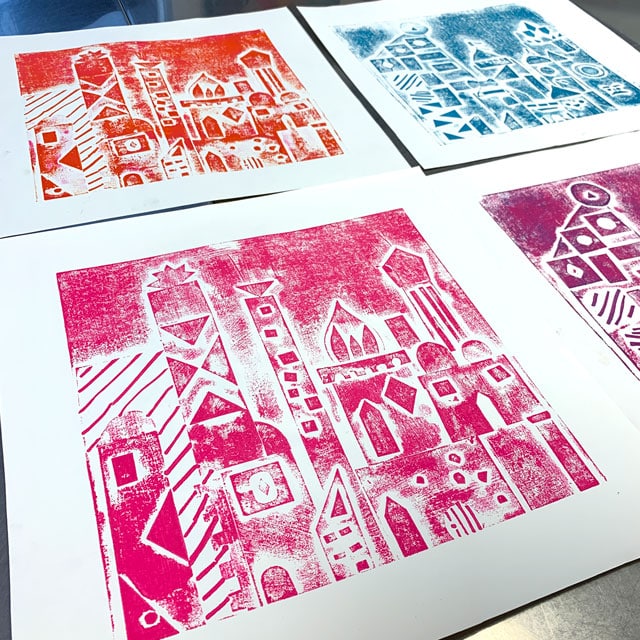
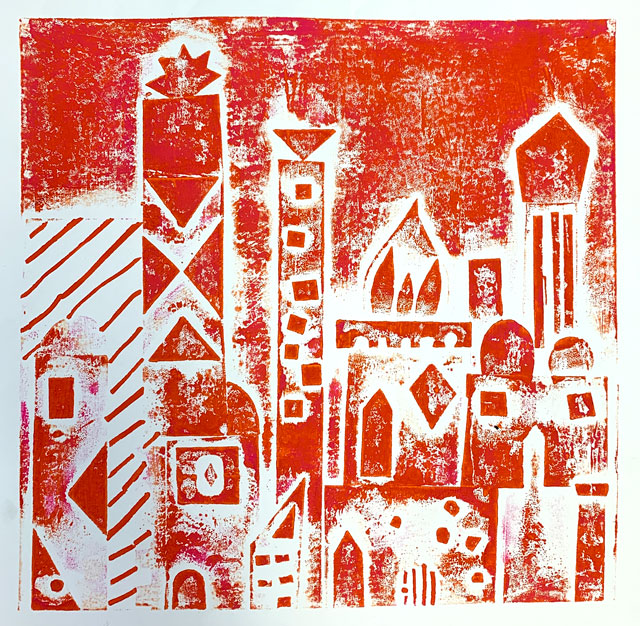
PRINTING YOUR COLLAGRAPH:
- Pulling a print from a collagraph generally needs a heavy inking for the first print and less ink on subsequent prints. We try to pull 2-3 clean prints per student.
- We always talk about the proper way to sign a series of prints, numbering each print.
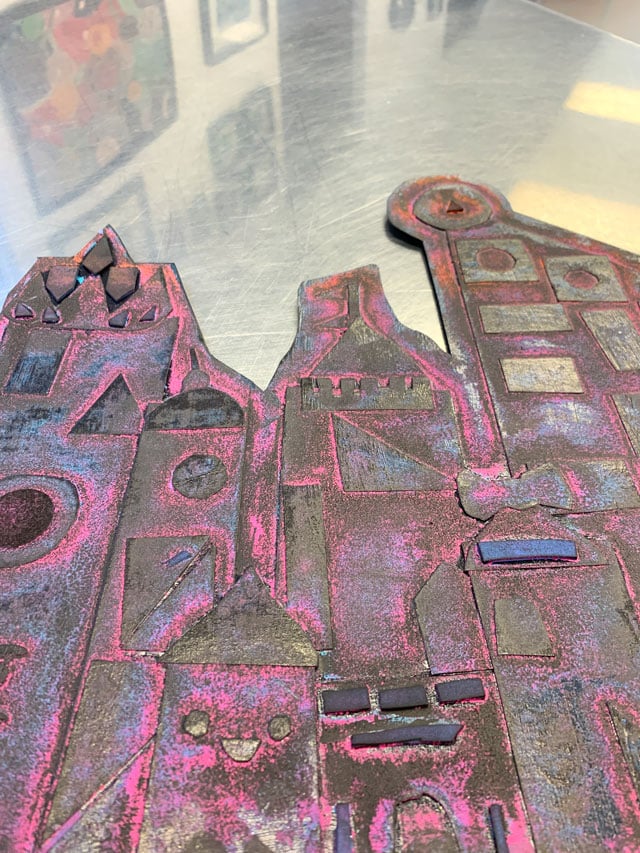
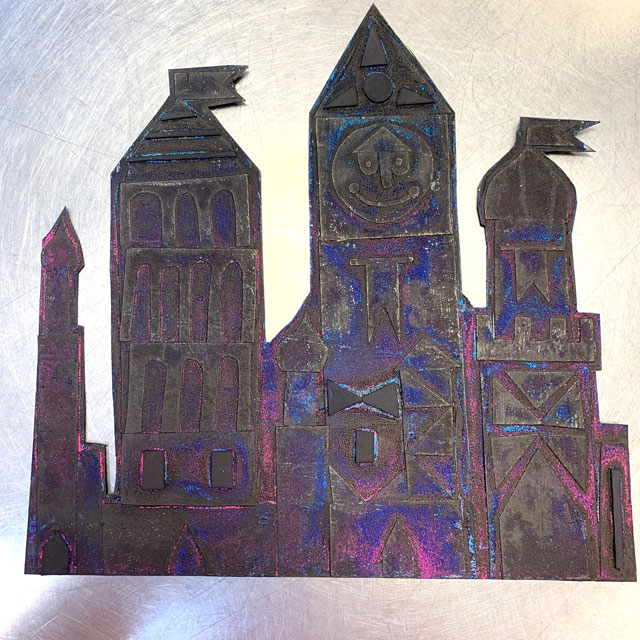
ALTERING YOUR PRINTED COLLAGRAPH PLATE:
- Students are generally VERY attached to the actual printmaking plate and don’t want to leave it behind. Turn it into another piece of art! Ways to extend it:
- Work back on top with chalk or oil pastel, paint, or glitter.
- Add a wire hanger with beads.
- Work back on top with paper collage elements. etc.
For other collagraph printmaking projects for teens, click here!


What kind of ink did you use for this print making project?
We use a water soluble block printing ink – we love Blick brand Block Printing ink!