You Need:
- Large piece of cotton fabric (we tear up old sheets)
- Large piece of drawing paper, at least the size of your fabric
- Wax paper
- Pencil
- Sharpie
- Washable School Glue
- Various colors of acrylic paint. *Note: acrylic paint doesn’twash out of fabric, so wear clothes that can get messy.
- Paintbrush
How to Do It:
- Draw a few sketches of large, overlapping leaves. Get creative – leaves come in all different shapes & sizes!
- Draw the final design on a large sheet of paper and trace with a Sharpie.
- Place wax paper over your drawing, and lay your cotton fabric on top. Tape the edges to the table if necessary.
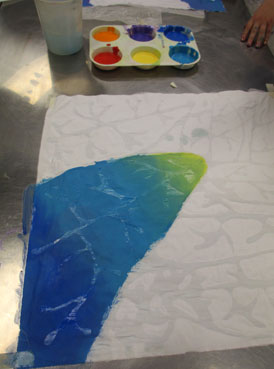
- Trace the drawing with washable school glue. All areas where glue is applied will be white in the end. The glue needs to be applied thick enough to be visible, but avoid puddling. Let dry overnight.
- After the glue is dry, leave the wax paper under the fabric, and paint with acrylic. Our batiks were painted with a combination of warm and cool colors (warm colors for the leaves and cool colors for the background, and vice versa). Inside the leaves, you can blend your colors for an interesting effect. As an option, you can water down your acrylic paint, but you don’t want it to be so watery that the colors are too pastel or light. Dry overnight again.
- When the paint is dry, it’s time to wash the batik. You can either do this in the kitchen sink, or the washing machine. If the wax paper stuck to the glue, do not attempt to pull it off the back of the fabric, which will only cause it to come off in tiny shreds! Instead, first soak the fabric with the wax paper still attached to it in warm water for a few minutes to loosen the glue so you can remove the wax paper in a solid piece. Then soak the batik in very hot water for approximately 30 minutes to dissolve the glue, gently scrubbing where necessary. I prefer to just throw the glue-y batiks in the machine on a short pre-soak cycle with hot water, no detergent. Hang to dry. (One other word of advice – use a very high thread count cotton fabric for best results – like I said, we tear up old cotton bed sheets. Low thread count cotton like muslin will not hold up well in the wash cycle and the loose threads will get all tangled.)
Recommended Posts
Showing 14 comments


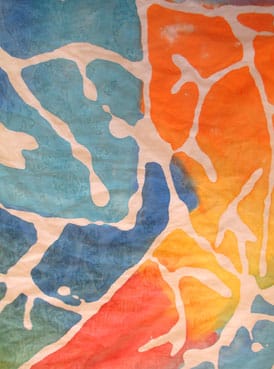
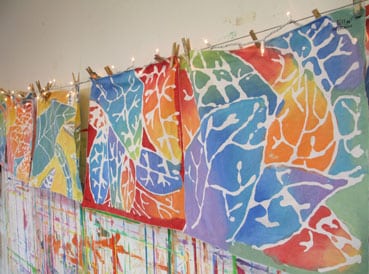
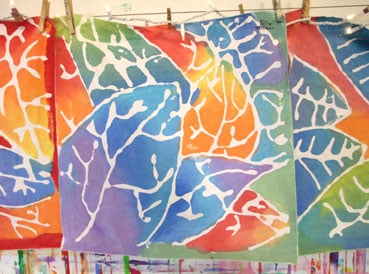
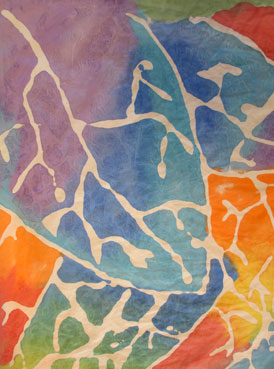



Oh my goodness! Beautiful! Christmas presents anyone? Maybe holly leaves & berries too?
I love this! So pretty! I can’t wait to try it with my girls!
What grades did you do this with?
Hi Kelly – we do these batiks with all ages 5 – 14. The process is very simple and the end results are ALWAYS fantastic. Always. It’s a sure thing – even if their “drawing” is a little hard to make out – it’s still a cool piece of art. In fact, sometimes the simpler the drawing – like a little stick figure self portrait – the better the end result. It’s just a great process & alternative way to capture children’s original line drawings. These leaves were done by probably 7-9 yr. olds. ~Jennifer
Jennifer,
Could you show some examples of some 5 year olds have made?
If you cannot on here, would you email me a few examples?
I have a niece that is almost 5 and I have been searching for some fantastic craft ideas we could do together.
These are incredible!
Thank you in advance,
Maija
Thank you so much for this post! I did this with my K-3 class and they absolutely loved it!!
Thank you for the great instructions. I have just discovered your website and I’m finding so much inspiration!
I was planning on doing Batik soon with my 10 year olds using the same method, but with glue and food dye. I made a trial attempt myself and was horrified to see all the colour wash out of my white poplin when I attempted to wash out the glue… eeek! Do you have any advice for setting the colour? I was sure the dye would infact dye the fabric, and I’m amazed to read that you’ve had success with acrylic paint.
Any insights/ideas would be gratefully received!
Thanks
Hi – we have pretty good results just with just plain ol’ acrylic paint (the cheap kind – like from the craft store- the more liquid kind in a squeeze bottle, not heavy bodied that comes in a tube). You just want it to survive the hot rinse that dissolves the washable glue, it’s not like they’re going to be washed over and over. Try it!
could I make pillowcases out of these? what if I dont have wax paper, what else can I use
Hi there -in the absence of wax paper, anything see through that creates a barrier between the paper underneath on the bottom layer, and the fabric on top (where you’re tracing with glue) – so something like plastic wrap, would work just as well!
I’m a little confused by the process….are you tracing the lines? Can they be seen through the fabric and wax paper? That part is unclear to me.
Hi there – yes they can see through the layer of fabric and wax paper (you want to intentionally use a thin cotton fabric that you CAN see through – it wouldn’t work if it’s like a thick canvas fabric) — to that way they trace the lines with glue.
Hi – any problems with the glue and paint in your washer? I’d like to try this with my students, but that would mean 45-60 pieces in a washing machine and I’m worried about ruining the machine and/or the plumbing!
Hi Julie – not really. I think if you pre-soak them in a really hot sink first it would dissolve a lot of the glue first – and I would only put about 7 or so in the washer at a time, depending on size, so that there is a lot of water. Hope that helps!