

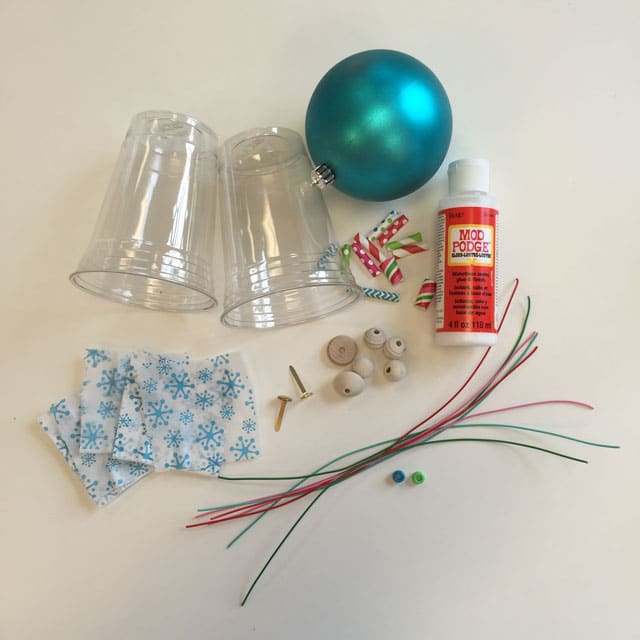
YOU NEED:
- Large plastic “shatterproof” ornament
- Two medium sized plastic cups
- Awl
- Wire (we used Twisteez)
- Mod Podge
- Two 1.5 inch brads
- Tissue paper
- Beads
- Small wooden wagon wheel for the neck (optional – you could use another type of bead instead)
- Paper Straws (optional – you can use beads instead)
- Paint markers (also optional)
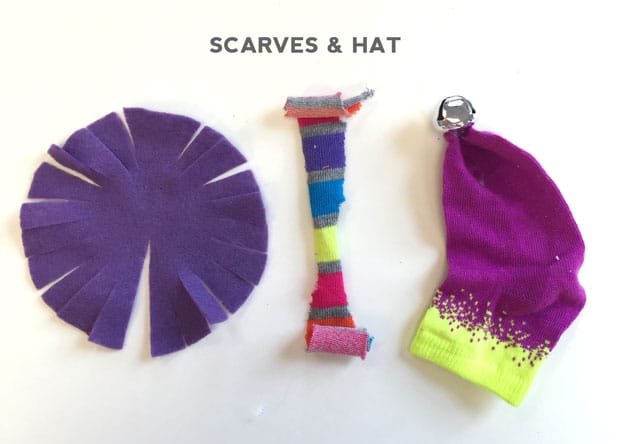
- Felt & foot end of sock for scarf & hat
- Glue Dots (you can use a hot glue gun as an option, but we wanted the kids to be able to do most of the assembly and glue dots worked great)
- Small right triangles of foam board or cardboard for the ears.
- Buttons, medicine caps & jewels for eyes, nose, mouth, etc.
- Brightly colored ribbon & trim.
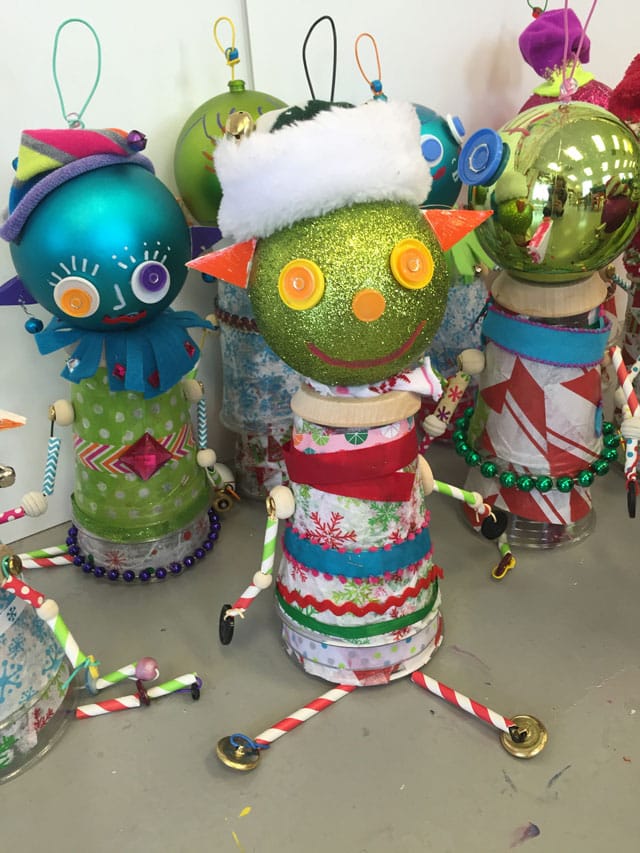
Elf Craft Tutorial:
These adorable elves are a fun way to brighten up your holiday decor! Enjoy our Elf Craft Tutorial below and be sure to share yours with us! We’d love to see them!
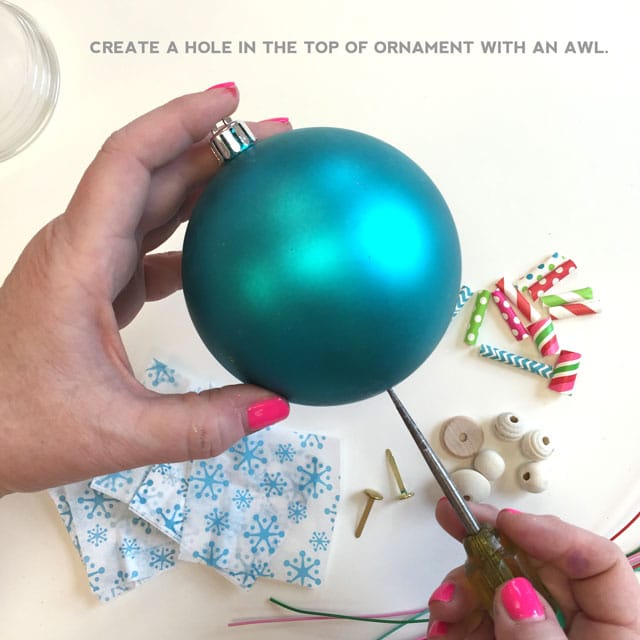
Start by creating a hole in the top of the ornament with an awl. I’ll be honest – the picture makes this look easy. I would describe it more like slowly “boring” a hole… just go slow and don’t point the awl towards any body part in case it slips! There might be an easier way to do this (hammer & nail to get a hole started + an extra set of hands to hold it??) – this is just how we did it.
We didn’t take a picture of the next step: prep the cups by using the awl to poke a small hole in the top of each one, and make arm holes in the sides of one of them to insert the arms later.
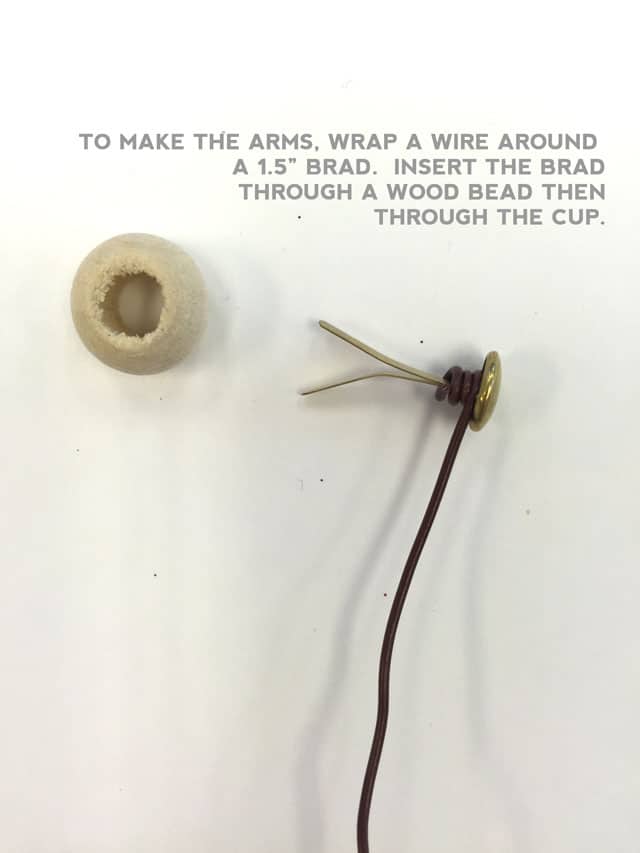
Prep the arms by wrapping a wire around the head of a 1.5″ brad. Set aside until you assemble the body.
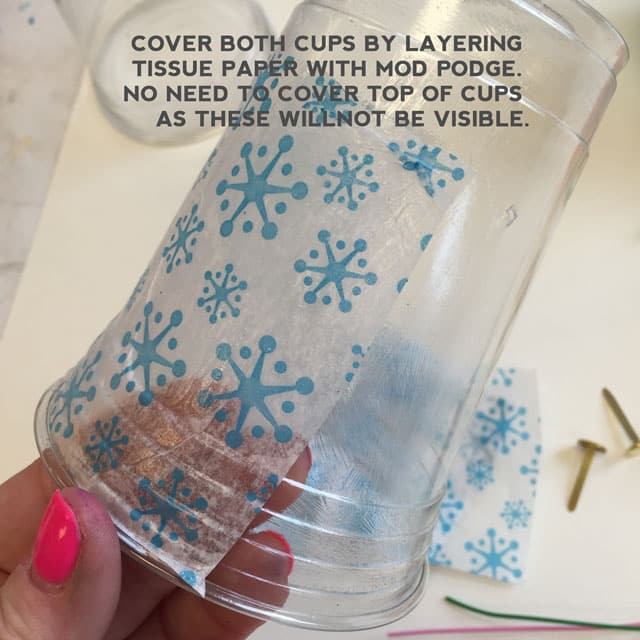
Decoupage tissue paper around both cups & set aside to dry for approximately 20 minutes. While the cups are drying, we had kids start working on making their elf faces.
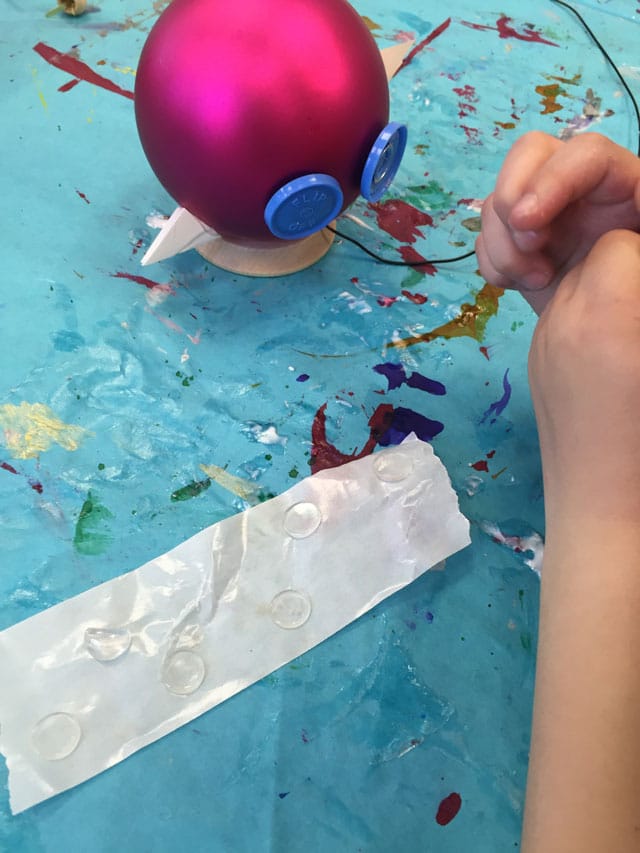
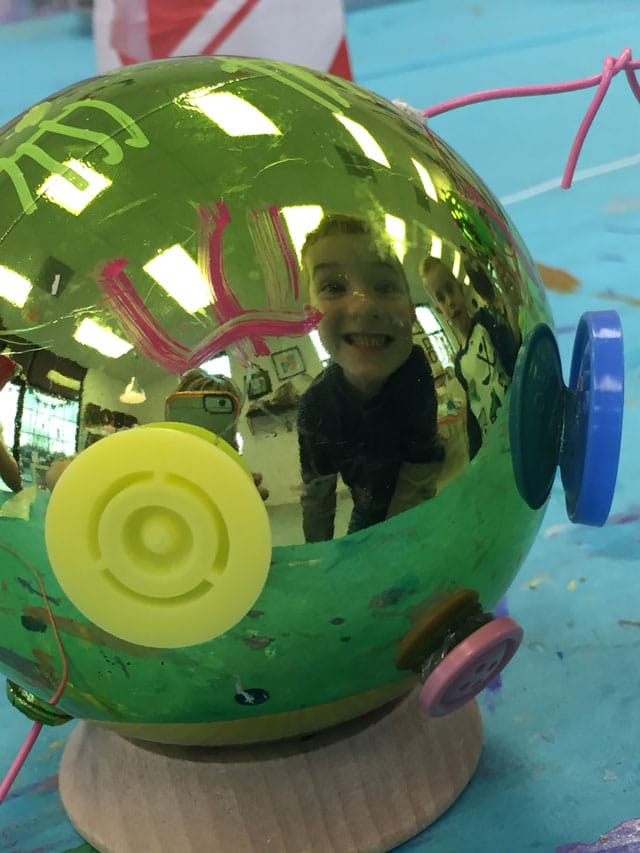
We opted to not fight gravity with school glue and instead, the kids used really strong glue dots to glue everything on the face. We encouraged them to layer medicine caps, buttons, & jewels for the eyes.
The kids used paint markers to draw other details on the faces – eyelashes, noses, etc. They started looking like little alien elf babies from outer space but that’s one of the things we really loved about them!
Next – the body assembly! This might be tricky the first time, and you might just have to fiddle with it and come up with your own system, but here’s how we did it.
First, go ahead and attach the arms with the brads in the cup that will be the top of the body. We inserted a wooden bead between the brad and the cup to act like “shoulders”. You won’t be able to attach the arms later after you string everything together. Ask us how we know.
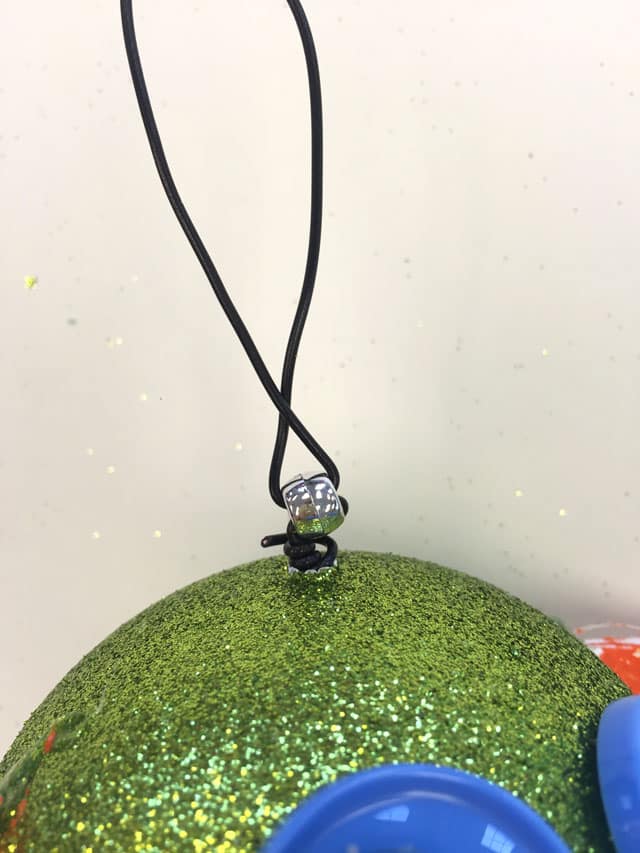
Next, pop off the little plastic gold or silver ornament cap (in the photo below, the top of the ornament where the cap was is now the “bottom”). We found it was easier to thread the wire from the top down by starting in the smallest hole, which is the one that you make with the awl. Then just (patiently) fish the wire down & out of the much larger hole on the other side, and continue on from there, as illustrated below:
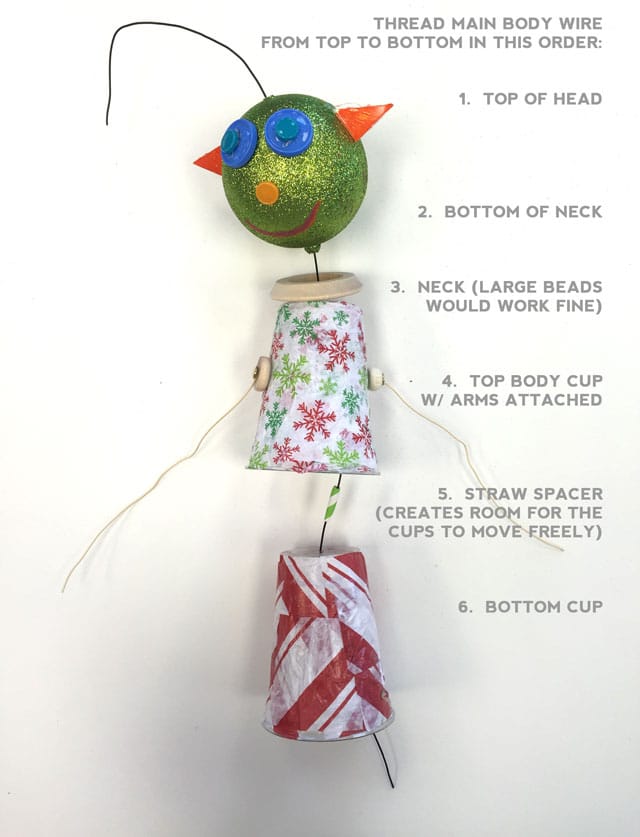
After you thread all the pieces together we suggest twisting the top of the wire at the top of the head so that it all doesn’t slide off. The bottom end of the wire will become one leg.
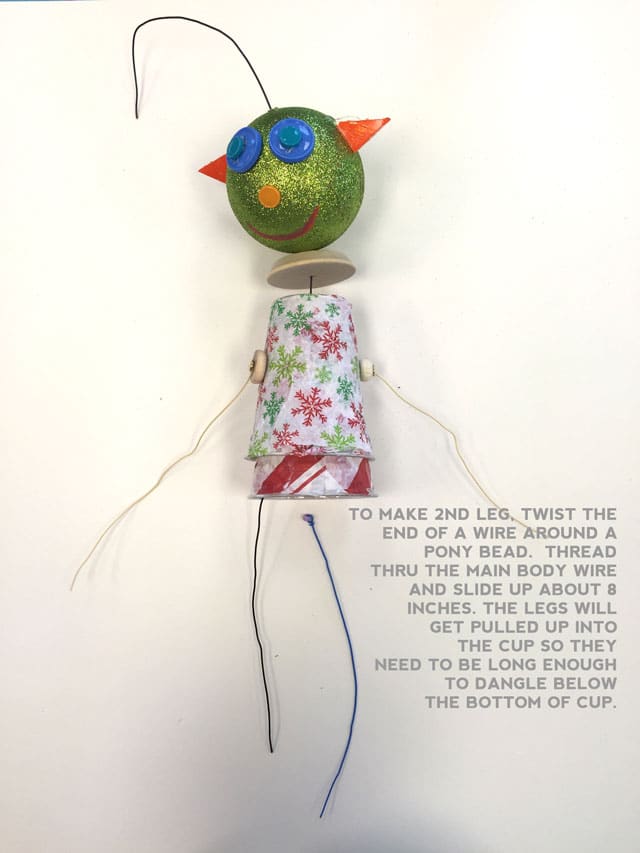
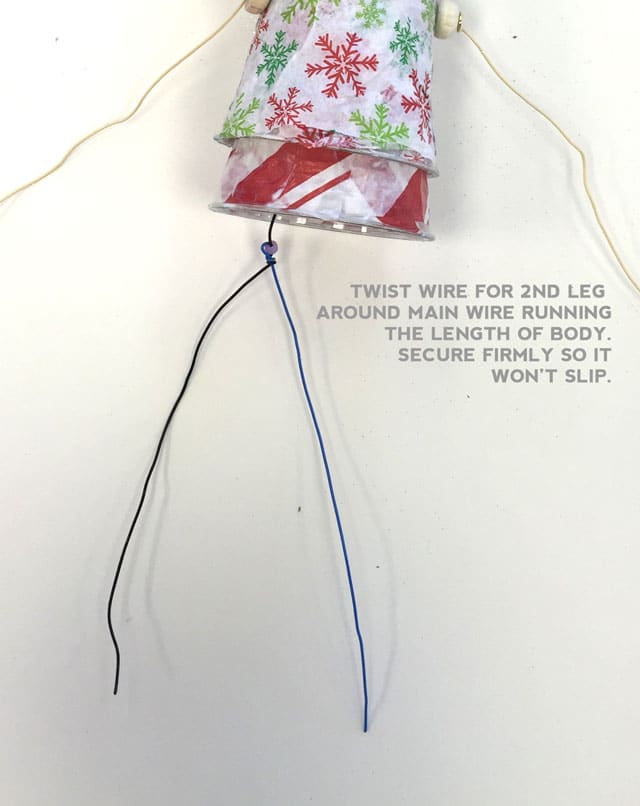
To make the second leg, take another shorter piece of wire and twist a pony bead on the end, and then slide it about 8″ up onto the main wire and twist them both together very tightly so they won’t come apart.
Note the little spacer straw in between the cups in the above photo. This is a really critical component. Without a spacer the cups will stick together and will not spin and move freely. You could make a spacer by just stringing about six pony beads instead – how much of a spacer to add is really up to you and depends on how far you want the lower cup to show under the top cup.
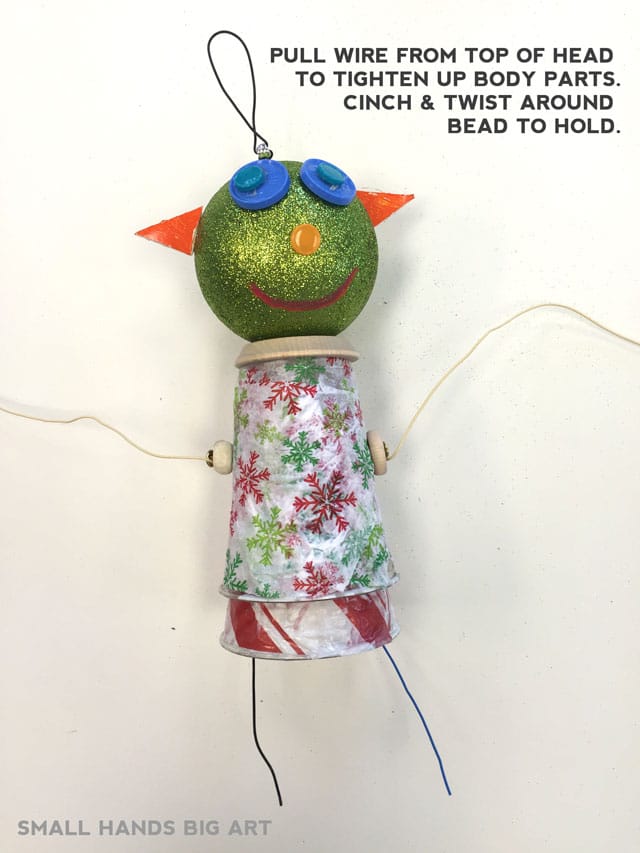
Next step is to tighten it all up! Just pull on the wire from the top of the head, causing everything to cinch up. The legs will come up inside the body until the pony bead reaches the bottom of the cup, but they should still dangle a little. Pull the wire at the top of the head until all the pieces come together tightly. Hold everything in place and twist the wire to make a loop. Thread through a pony bead to help further tighten it. The point is you do not want the main wire to be able to slip back down thru the top of the head.
After assembling the body, the rest is easy!
We beaded our arms & legs with decorate paper straws, using one straw for the upper arm, a wooden bead for the “elbow”, another paper straw for the lower arm & a button twisted on the end for the hand. Trim off the excess wire.
The legs are made almost exactly the same only we used longer lengths of paper straws.
Last but not least, embellish and accessorize to your heart’s content! If you have the kids start embellishing the cups BEFORE it is all assembled just point out to them that it’s not necessary to glue beads and jewels onto the BOTTOM cup because for the most part, this will be hidden within the cup for the upper body. We used a hot glue gun to help them glue beads & other heavy stuff at the end.
Lastly, we slipped on little felt scarves (a circle with a slit it in) and a little hat. We used old fuzzy socks with a jingle bell glued on top. We cut a tiny hole in the top so the wire hanger could slip through, and then because the ornaments were so big and the hats just wanted to slip right off, we used two glue dots on the head to help hold the hat on!
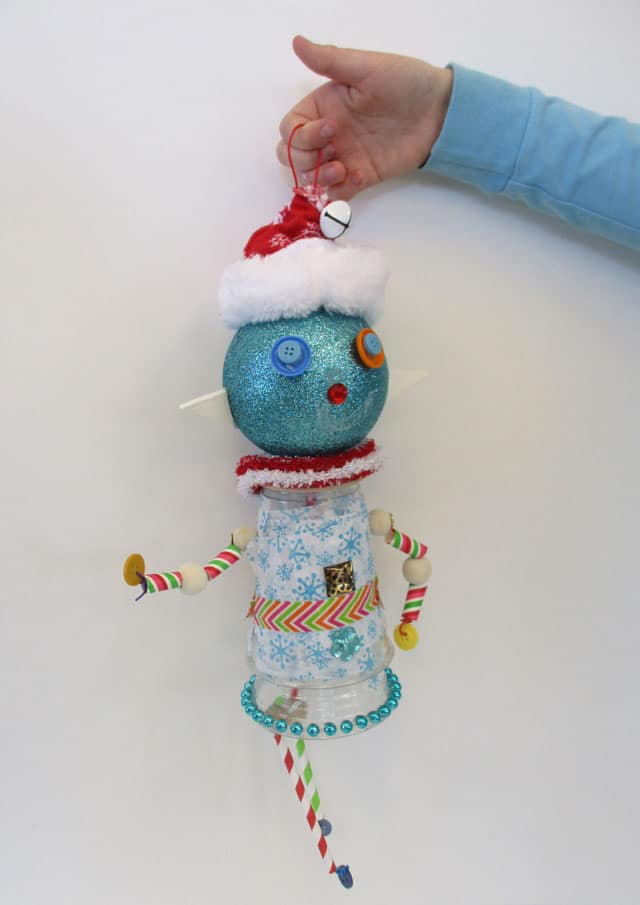
So there you have it: Small Hands Big Art’s Elf Craft Tutorial ! That all sounds much more complicated than it really is! We just sort of made this all up as we went along, so I’m sure there are much easier ways to make these! The cool thing the kids loved is how they moved, danced, & spun around!
This project should really be called Bobble-Head Baby Alien Elf Dolls! We’d love to see pictures if you make these at home!

