

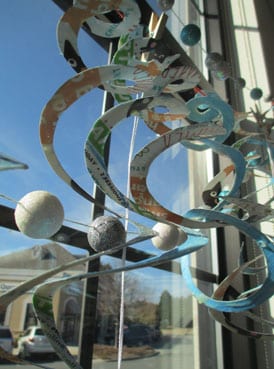

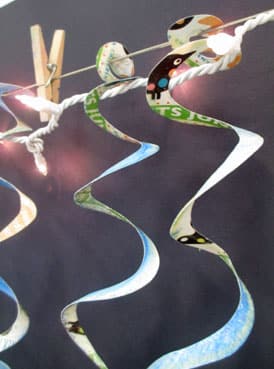
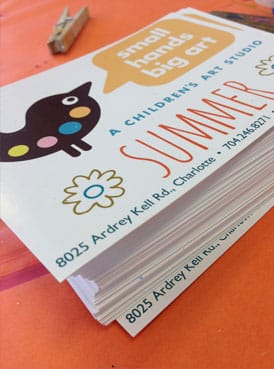
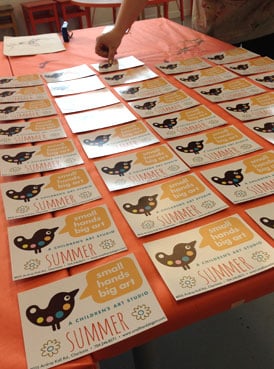
We love to decorate our studio windows for the holiday season! This year, Katie came up with a fabulous idea that made good use of a stack of leftover summer schedule postcards that were headed to the recycle bin: Upcycled Icicles!
The studio is surrounded by large windows on three sides, so the downside is that we needed about 250 icicles to create the look we were going for. By the end of this little project, we felt like hot sweaty interns slaving away on an elaborate Anthropologie window display. Even though we were exhausted (and by “we”, I mean mostly Katie), covered in wax drips and glitter, and totally “icicled out”, we think it was totally worth it! Assuming your decorating needs are on a much smaller scale, this makes a super unique and relatively easy DIY project!
You Need:
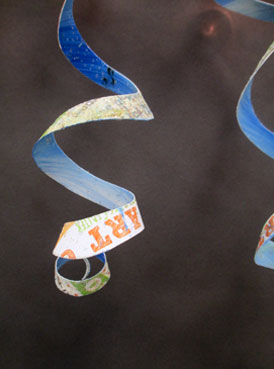
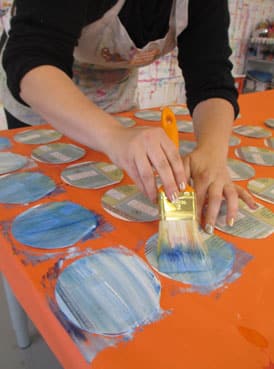
- Supply of heavyweight cards tock scraps that can be cut into 5″ circles. If you like the pattern of the paper, there is no need to paint them, but we liked the contrasting effect that applying a coat of paint to one side created when they were dangling.
- Acrylic paint in your choice of colors (optional). We selected cool winter hues of blue & turquoise.
- Gesso or acrylic medium (also optional, if you decide to paint one side)
- Large paintbrush
- Scissors
- Beeswax
- Clothes pin
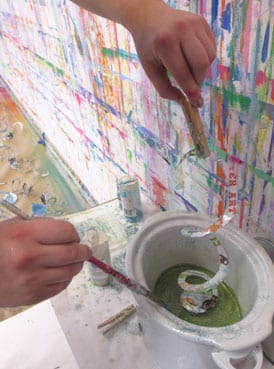
- Crock pot or double boiler to melt wax
- Super fine glitter
- Large drying area
- Baker’s twine
How to Do It:
- Loosely mix gesso or acrylic medium with one or two colors of acrylic paint and quickly paint one side of the card stock. The idea isn’t to make it look perfect but rather just apply some color and texture to one side so that it contrasts with the opposite side when they are cut into a spiral. Let dry. The gesso separates the paint pigments so you can see brush strokes and the paint colors.
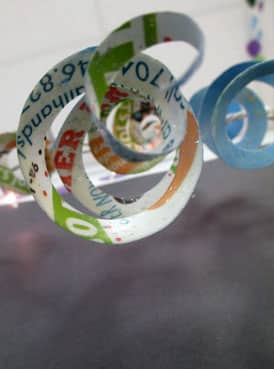
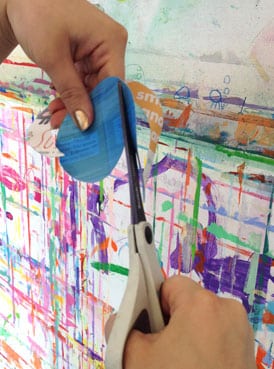
- Cut into 5″ circles. They don’t need to be perfect.
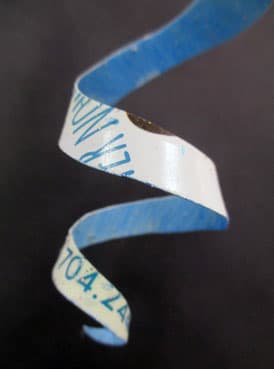
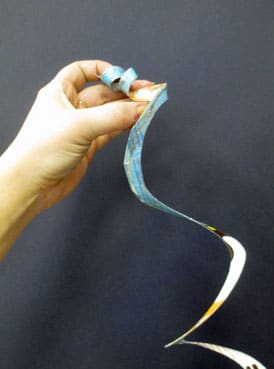
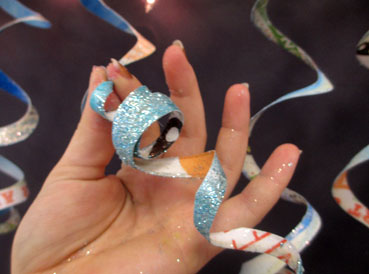
- Cut the circles into spirals, starting with a very thin cut from the outside of the circle, gradually getting thicker towards the middle. If the cuts are too thin all the way to the middle, the icicle will be longer, but too fragile and will break. If the cuts are too thick from the outside all the way to the inside, this will result in short, stubby icicles.
- After cutting into a spiral, secure the center section with a clothes pin and dip into melted beeswax. Gently lift the spiral out of the wax and grab the end of the spiral with your other hand and gently pull it to lengthen the icicle. As the wax starts to dry, shake super fine glitter on it. Hold it in the air for a few seconds as the wax dries and then lay on a drying sheet to finish setting up. The wax is necessary to add weight and bulk to the card stock, and it also makes it easier to shape.
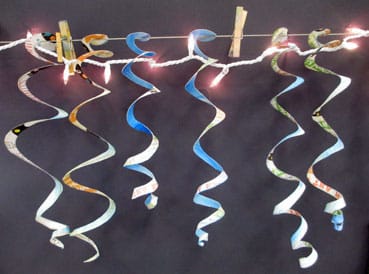
- String a piece of baker’s twin across a window, attaching with a thumb tack on both sides of the window.
- After the wax has cooled, cut a very small slit in the center of the icicle and slip it onto the baker’s twine.
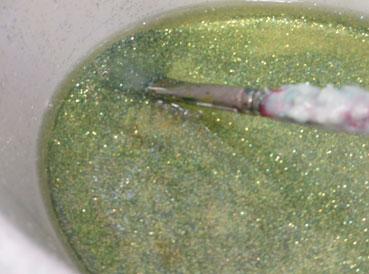
Don’t add the glitter to the wax – this is just what happens to it when you shake the super fine glitter on the icicles after removing them from the wax.


Upcycled icicles using card stock recyclables is lovely! I wonder if this could be done with soda cans? It would be sharp, so thick gloves would have to be worn. But the shiny insides and bright colors of soda cans, specially red Coke and green ginger ale cans, would look great. Just a thought. Thanks for sharing all of your great ideas. They are all very original and well presented.
Love the soda can idea Heather!